Subtitle

. . . . . . A place to contribute, exchange tips and ideas and find further info on the LDC group on Meetup.

Showing posts with label project. Show all posts

Saturday, 5 August 2023

Another project

 I'm quite pleased with how this blouse turned out.


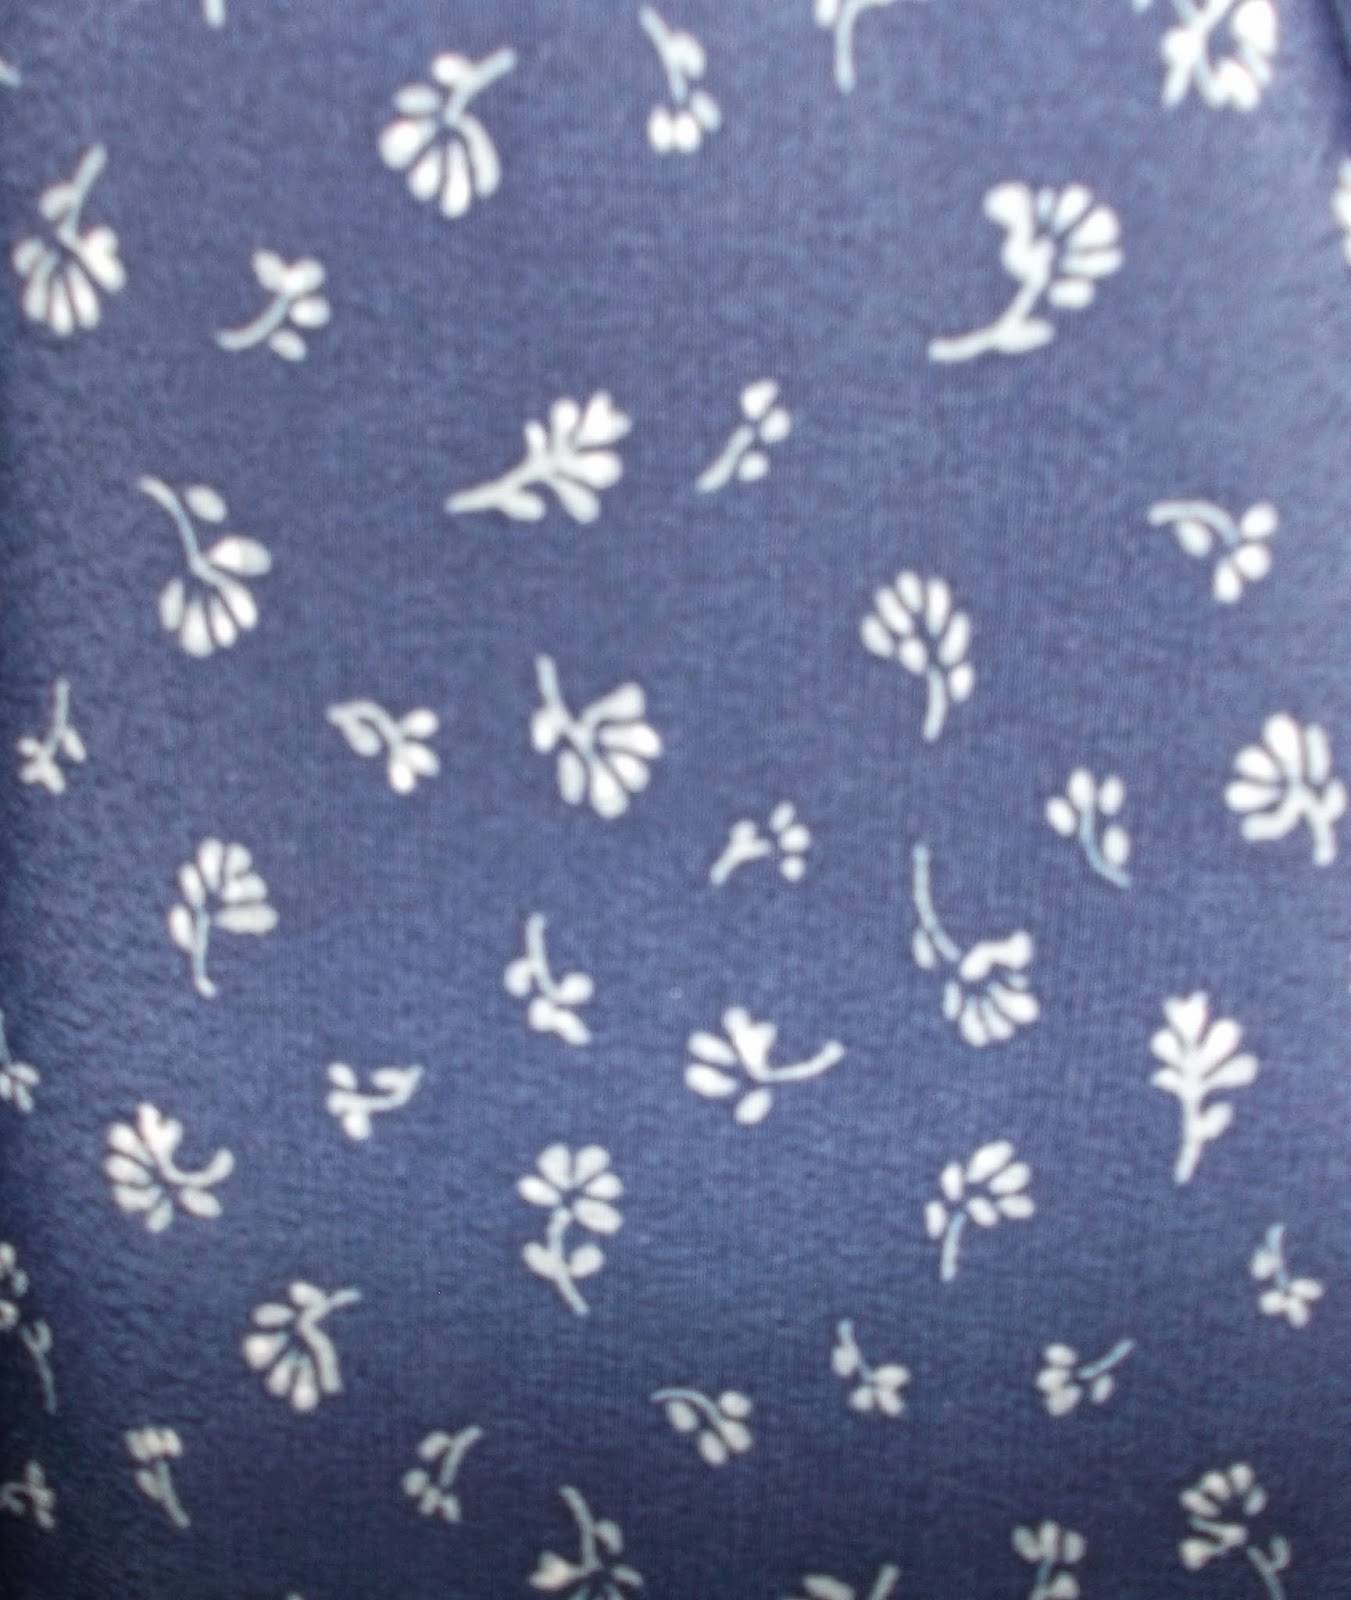
I had wanted to use one of my sleeve drafts and I also had this lovely Rose and Hubble fabric (this is the black and white colourway, I also bought some in the blue and white).

I should have paid more attention to which blouse pattern I picked - I had to adjust the shoulders too much on this one because this started out as a sleeveless top with those silly cap sleeves.  They look horrible on me, just make me look like a prize boxer: huge shoulders, it's totally the wrong proportion on me.

I finally managed to fit my sleeve template into the newly adjusted armhole, phew.

The sleeve is meant to have a peaked cuff.  The cuff is only attached at the bottom and was supposed to stand away from the sleeve at the peak.  I did adapt the pattern to give the cuff more room at the peak by slashing it and pulling the two pieces apart at the top (hinge at the hem/bottom) - leaving a gap of 3-4 mm. I didn't realise that this wouldn't be enough.  Because the cuff sits on top of the lower sleeve layer, it just doesn't leave any gap. Ah right, I'll know for next time.

This is a not very good photo of the sleeve:

I found some great buttons that go well with this:

I sewed the V-neck down from the right side by edge-stitching at about an inch, to make sure that the facings would stay down.


Saturday, 3 March 2018

Please contribute: tips for sewing a simple skirt

Shall we do a collaborative blog post?  All about tips for sewing beginners about sewing a skirt.

At our monthly meetings we often get the question from sewing beginners: "I would like to sew but I never have before and I don't know where to start".  We have lots of advice and tips so how about collecting it all in one place?  Like right here!

We often recommend that a beginner sew a simple skirt first. There isn't quite as much going in terms of different elements that a dress or trousers would demand (getting sleeves to fit into the armhole, or doing a front zip on trousers).

First tip: when you want to use a stretch fabric and you have never sewn before then pick a firm jersey fabric that is a bit thicker than the cheaper jerseys that are very saggy and extremely difficult to sew with. Sewing with thin jersey fabric is something that I still can't do. Avoid it if you want to retain your sanity. Honestly.

Woven fabrics are much easier to sew with (as far as I'm concerned), but because they don't stretch they need to be fitted to your shape to look good.

There are different skirt styles with different degrees of difficulty. A gathered skirt made from two rectangular pieces is the easiest, - circular skirts and skirts made from flared panels are also relatively simple.

The more pieces your pattern has the more sewing you'll do, but you also get more opportunity to fit the garment to your shape because you have more seamlines you can adjust.

Sewing in a zip isn't as difficult as I feared when I was a beginner but you may want to go with a button closure on a first project. See how you feel.

A commercial pattern is useful because it has instructions: not just how to sew but there is also the layout of the pieces for cutting out, and it tells you which piece to interline. There is also really useful guidance on seam allowances and how to do the different ways of stitching (like top or edge stitching, under stitching, stay stitching, or how to stitch for gathering - all kinds of information).

The sewing pattern size is not the same as your dress size in shops. Measure your waist and hips and compare to the measurement table on your pattern. Most pattern envelopes have multiple sizes in them, often split by the smaller and the bigger sizes.

Above all pick a skirt shape that you are excited about! I often make the mistake of falling in love with the pretty fabric they used and forget to check the line drawing to see if I actually like the style. Which is kind of important.

Now I've gone on much longer than I meant to. I haven't even said much about sewing itself (the things we discover as we go along) - I hope that other Dressmakers Club members want to give tips and advice in the comments!

Thursday, 28 May 2015

Member of the month - Beth

How to sew a ball gown in a bedsit without (entirely) losing your mind
 
I am fairly new to sewing and when I started I shared a large two bedroom flat with one other person....  now I live in a very small "Studio" (really a bedsit) in East London.
 
This adventure started as most of my sewing projects do… with some beautiful fabric I bought nearly eight months ago. And for the sake of full disclosure I am still working on this project. But there is a photo shoot on the 31st of May  and I am hopeful it will be ready.  I will post photos of the completed dress. 


It being an African printed canvas as I had to buy 6 yards of this beautiful gold and turquoise material, with a complex geometric pattern.  For £15 how could I go wrong? If you live in London go to Dalston market and look for the store near to the butcher selling cows feet.
 
Having so much beautiful fabric I decided to make myself a ball gown length full skirt. To put this decision into context I live in a tiny bedsit in central London so sewing something this big was always going to be a challenge but little did I know how much of a challenge it was going to be.

Also I am also a very novice sewer and the only things I had managed to complete before starting this project were a pleated skirt and some shoe bags. But fortune and fashion favour the brave, and I foolishly thought that it would only involve sewing longer seams. A lot of unpicking for accidentally sewing the pleats together happened when sewing the skirt.
 

I experimented with various ways of pleating the fabric, but as it was very stiff it looked more like a kilt than a ball gown.  My solution buy a vintage vogue dress pattern and just not sew the top bit, and add half a meter to the bottom. Turns out that this would have some interesting structural implications.
 
My first challenge was cutting out the fabric.  I discovered that the fabric was very narrow compared to others that I have bought. This meant that the gold bits would be hidden in the pleats of the dress if I used my original vertical layout, so  I opted for a vertical layout. I also had to cut from salvage edge to salvage edge. 


My room is only 4.5m long so I needed to rearrange my furniture so that I would have a clear path to lay out the fabric.  This was like playing solo twister! 

 
I then started to place the fabric so that the patterns would match, given the horizontal & vertical patterns in the fabric, choosing a pattern with princess seams, was not the best idea (next time solid colours only!). I thought I did the pattern matching correctly but turns out I matched on the cutting edge rather than the sewing line. GRRRRRRR!!!!!!!  After much foul language, tears  and ripping out seams I got to a place that I was happy with, the patterns if not the fit.
 

The pattern was originally a dress and in altering it I forgot to take account of the weight of the fabric.  It being very heavy I needed to put some structure in place.  I originally tried grosgrain in place of boning on the outer skit, then tried to use it as casing for plastic boning. Neither really worked. I tried boning the inner skirt, but it wasn't strong enough.

In order to provide the support  that I needed I had to sew a underskirt and add a wider boning to it. Professor Pincushion has some useful tutorials. But this didn't look that great. I have now opted to sew the boning to the grosgrain then sew the grosgrain to the outer fabric. 


And this is where I have got to so far.  To do  this week: 
1) adjust fit of skirt (I have gained weight over the last 8 months)
2) finish sewing in the boning/grosgrain 
3) attach Petersham at waist 
4) attach underskirt
5) do zipper
6) hem 9m of circle skirt :( 

 
7) Find an occasion to wear this thing! 
 
What I have learned
  • Buy a foam gardening kneeler (pound shop ones are good), it will save your knees when pinning and cutting fabric.
  • Yes it is worth it to baste your seams.
  • If you are going to be walking on your fabric to cut it out wear clean socks.
  • Electrical tape is awesome for marking hemlines and holding seams together.
  • Write the piece number and direction to the centre front in the seam allowance so that you can remember which piece is which when you come back to your project  after a few weeks.
 

Friday, 24 April 2015

Our Sewalongs


Butterick 4790

Every so often we schedule sewalongs as part of the LDC group's events.  This is how they work:

Our sewalongs usually start with some members of the London Dressmakers Club deciding that they would like to make either a specific garment or item, or something with a specific theme. Sewalong aren't "meetings" as such.  We don't meet up in a physical location for this, this is an opportunity to sew the item at home, at your own pace: a sewalong is just like a knitalong, you do your own thing and then you compare notes.

The scheduled event gives you a chance to exchange tips and comments with the others who have signed up. You can post comments on the Sewalong meetup page, or upload photos in the suitable photo album.  If you have a query or get stuck with your project, then ask a question in the comments or bring your work-in-progress along to a monthly meeting to ask the others for advice in person.

Meetup allows us to post meetings that last up to two weeks, but no more. The Sewalongs typically run much longer - we like to put them on for anything from two to three months.  It is up to you whether you might like to get started early and get it done, or if you want to space out your sewing a bit over the entire period. Life is busy and it can be a challenge to find sewing time.  It is important to be able to sew in whichever way works best for you.  The Sewalongs can be great inspiration and motivation to complete a specific item.

Some sewalongs are quite informal: we did put a 'simple item' sewalong on a while ago and dressmakers could make anything they wanted. We set a time of two months and invited comments and photos but didn't suggest any other framework or structure.

Other sewalongs were a bit more structured: we split the two months into several two week slots that we scheduled individually and suggested specific tasks for each part.  We will probably keep doing both kinds of sewalongs, some people prefer one to the other.

Our May/June/July sewalong is to make a Summer Wrap Dress - any kind. This came out of several members wanting to make the Walk Away dress (as seen on the Sewing Bee 2015: Butterick 4790 or the vintage edition Butterick 6015. There was even a 'Walk Away Dress, the Mini Version'! Butterick 6204), some of us have the pattern and want to make it up.  It is up to you whether you want to make the Walk Away dress or another kind of summer dress, it doesn't strictly have to be a wrap dress, this is more by way of suggestion.  Go with whichever pattern and style of dress you feel like!

Butterick 4790


Butterick 6015

Do you have any question about our sewalongs?  Don't be shy asking, just post a comment below or on the relevant sewalong meetup page.

Happy Sewing!


.

Tuesday, 21 April 2015

A stash-busting skirt

My most recent project is this skirt out of two fabrics:


I had a little bit of the grey pin stripe, just about 25cm of it or so, and about a half metre of the dark red fabric.  No idea what to do with either, the jacket didn't materialise that might have offered an opportunity for the pin stripe to become cuffs, nor was I happy to have a very short mini skirt out of the red material.

Then I realised I had the same width in both fabrics (150cm wide) and they were the same material (wool) and weight!  Wahey, if that wasn't meant to be...


So I sewed both of 'em together and then treated it as one piece of fabric with an obvious line in it that I had to match between all three pieces: front (cut on the fold) and the two back pieces.

I drafted my darts in the back pieces and sewed those up, coming to a nice shallow point (I like to stitch along the edge of the fold for the last 3-4 stitches or so, with as few fabric threads till the folded edge as you can without sewing off the fabric.  Here's a post on darts that I prepared earlier!).

I didn't use a ready made pattern (I went to my trusty body block from Wendy's pattern drafting course at her MIY Studio in Brighton) so I couldn't follow instructions.  I just went with what made the most sense to me.

I got into a bit of a mess with the lining at some point, but it all ended well eventually. I put a lapped zip in first, then closed the side seams, attached the lining at the top edge at the waist and later sewed the lining edges to the zip on the inside.

It had taken quite a bit of time to get to that stage - but I finally tried on the skirt once I could.  I had a bit of a shock: the panel of the grey colour sits much higher on my hips that I had fondly imagined.  I was really disappointed actually because it just looked... odd...

It was neither a panel, nor a yoke, but just a nothing sort of thing. I did not like the proportion between the two blocks of colour at all.

I had so looked forward to trying the skirt on and getting it all done, and it looks like... Something not at all to my liking.  I felt quite disheartened and upset.

Then I thought: what about a fix that pulls the eye down from that line between the two fabrics?  How about a plain black ribbon at the point where I would have wanted the seamline to be?

Well!

I think it looks pretty good even if I'm a bit prejudiced. I think this did the trick. I am really quite happy with it now.

Here's a close-up:


I think I did quite well in matching up the ribbon ends "across" the lapped zip. Needed only a bit of hand-stitching (and some swearing when I stuck the needle into my finger... We won't mention that)

I wasn't completely happy with my first attempt at the hem. I had only folded it over and stitched it down.  My sewing thread didn't match all that well and the hem looked all puckered despite copious bouts of pressing with lots and lots of steam. It just flipping wouldn't lie flat! Argh.

I wasn't happy so I did a blind hem by hand (I was sitting around with a crafts group on the Sunday afternoon just gone, and it got all done as if it was sewing itself)...

And now I have a much nicer seam:


I suppose I should attach a tab at the top of the zip for a hook and eye or something, but I can't be bothered.  Besides, that V shape looks quite interesting and I think I'll just leave it like it is.

What do you think?

And what kinds of sewing challenges have you encountered?  Please comment below - I changed the settings so it is now easier to leave a comment.

Thank you!

Friday, 17 April 2015

Member of the Month April 2015 Jennifer Taillefer


Hello everyone!  I am really loving being part of this group so far, as none of my friends are really into sewing, and while they are very kind about listening to me talk about projects, I can tell they don’t have a clue what I am banging on about!   So it is lovely to read the posts here, and to have met some of you at an outing.

I have been sewing since I was five years old, when my mother bought me my first little hand crack machine and showed me how to make outfits for my dolls.  I love to upcycle items, play with different ways of putting patterns together (is it called pattern hacking these days?), and to clash fabrics and colours.  I am very inspired by the fashions of the 1920’s to the 1960’s.  I have a particular love of very finely finished garments, and I am always trying out new seam finishes, and ways of making the inside of my pieces as beautiful as the outside.  If you want to know more about me my new website is at www.jennstitches.com .  I also really enjoy taking old garments and remaking them into new ones, especially as I hate to see fabric wasted.   Therefore Make Do and Mend is right up my street, and that combined with my love of vintage fashion made me eager to see the exhibition I am writing about today.

Fashion on the Ration: 1940’s Street Style is currently on at the Imperial War Museum.  As a lover of all things from the first half of the 20th century, I was eager to see it, and hopefully get some inspiration for my own sewing.

During the Second World War, women showed great ingenuity in clothing their families despite the rations that were placed first on ready-made clothing, and then on dressmaking fabrics.  By re-using and adapting clothes that were already in their possession they created new garments, and I would say a very personal sense of style.  I was really taken with how unique the women looked in the photographs in the exhibition, much more so than in group photos from earlier decades.

There are a number of homemade garments on display in the exhibition as well as a series of uniforms for various branches of the services, although the actual garments are outnumbered by photos of what was worn.  There is however, an excellent section on Utility clothing. 

The Utility scheme was introduced in 1942 as an attempt to create more equality in the clothing available to those in different financial strata.  When rationing was first introduced an article of clothing required the same number of coupons regardless of the quality.  Therefore someone who could afford a high-quality, robust garment would have it last much longer, thereby freeing up future coupon allocations for other wardrobe pieces.   Those who had to purchase much cheaper versions would find themselves needing to replace the garment a great deal sooner.  By introducing the Utility scheme the government was trying to standardise the quality of clothing, and at the same time save even more fabric for the war effort by limiting the amount that could be used for any particular kind of garment.

The range of clothing on display in this part of the exhibition is a testament to how much you can do design-wise with very little material!

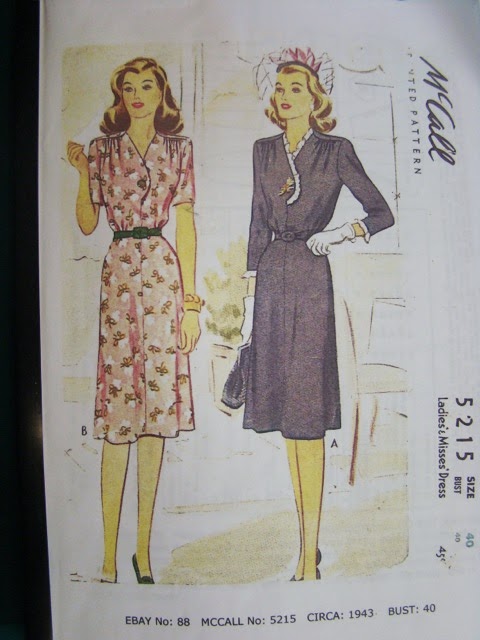
Seeing the exhibition inspired me to have a go at a vintage pattern I had bought last year.  This is a reproduction of a 1943 McCall’s dress pattern, and it uses surprisingly little fabric for the amount of style detail that is in it.


As you will see from the images, it is a lovely curved neckline, which is finished with a rather scanty facing - but why waste material on the inside!  I will say that the neckline was the hardest part of the dress, and I did have to baste it into place twice before I got it to sit nicely.  This is because the shoulder seam is sitting to the front of the shoulder and has a curve in it as well.  There are several large dots close together on the pattern at the shoulder, and it took some time to work out which ones were supposed to match up!  I did burst out laughing at my first attempt and I wish now I had taken a picture of it on the mannequin!


The fastening on this dress is a placket fastening.  Some of you might remember seeing the contestants on GBSB Series Two grappling with this on the vintage blouse they made.  Essentially the way it works is that the seam allowance on each side of the opening is faced with a small rectangle of fabric, one folding inside the garment and one extending past the edge.  These then overlap and have hooks and eyes or poppers attached to close the gap when the dress is done up.


The bright red button and the buckle on the belt were both vintage items I found at my great aunt’s home.  She was a seamstress as well, and I love adding little bits and pieces I found in her stash to my own garments.


The exhibition at the IWM is on until the 31st of August and is well worth a visit.  I particularly liked the recordings of real people sharing their experiences of Fashion on the Ration!  If you do go and get inspired to try a vintage make, then do post a picture of it so we can all admire.
 P.S. from Barbara- Do check out Jennifer's web site and all the fantastic things she has made in the photograph Gallery there.

Saturday, 31 May 2014

How to ... improvise a skirt

When I just started dressmaking, I could only justify to buy remnants. So I ended up with a lot of beautiful fabric, unsure of what to do with them. One of the remnants is a turquoise polycotton with yellow polka dots, about 130 x 115 cm. Perfect for a half circle skirt, or so I thought. It turned out that my skirt will be somewhere closer to a 3/8 skirt.

I started with the pattern Barbara helped me to make. I drew the circles, one for the waist and one for the hem. Since I did not have enough fabric, the one for the lower hem - of course - did not fit onto the fabric. My idea was to place the pattern right in the middle of the fabric so that the pattern could be easily altered. I can't stress enough how important it is that nothing from the waist circle must be cut off since that's the only part of a circle skirt which has to be fitted. I then connected the outer waist circle with the most outer point of the hem circle and made sure I left enough for the seam allowance. It should be a straight line.

I then stitched together the side seams and tried it on. It fits perfectly and I was so enthusiastic that I cut the fabric along the side seam. In my enthusiasm, I only forgot that I wanted to insert a zipper on one side and hence did not leave enough fabric to actually be able to do it. It was a big mistake (first time ever!) and I hope I learned for the future. After the shock, I decided to make my skirt a little bit shorter and put in an elastic band.

An unexpected hint from a friend to add pockets as they are quite handy to have lead to me finding this post with the "top 10" of pockets. It has a lot of ideas and is a very interesting read with a lot of links. For this fabric, I decided for in-seam pockets. I found this post clearer than the others but it's definitely worthwhile to read through the other posts as well. Since it is very well explained how you can add pockets in those blog posts, I take the shortcut and ask to read those if interested.


Once finished the pockets (I had to do them twice) the only thing left was the waist hem and the elastic band. I went for the most simple of options, zigzagged the edge and folded it over once to insert an elastic band.


Et voila:


Tuesday, 20 May 2014

Can I make a Dress in a Day? Part 1- Tracing a pattern from Burda Style Magazine


Of course, I am addicted to reading Dressmaking Blogs and am always amazed when the blogger says how little time it took to make a garment.  I was prompted to try and make a dress in a day after reading of a top with interesting seaming and a peplum that took only 40 minutes to make.  I had a whole day when I thought I had nothing to do so decided to give it a go.
There was a dress that I wanted to make that appeared to be straight-forward with only 4 pieces - Back, front, sleeves and a facing strip.  It was designed for stretch fabric and needed no closures or fastenings.  It was a pattern in a Burda Style Magazines.  If you are not familiar with these magazines, issued monthly, they appear to offer Dressmaker's Heaven, that is a large number of patterns for a small monetary outlay: for example 17 patterns for £4.75.  However, you might not like all the patterns in an issue plus you have to trace the individual pattern from sheets inside the magazine.  This is when Heaven may turn into Hell so I am going to show how I do it.
Each garment is given a number (106 in my case).  On turning to the instruction in the magazine for that particular number you will see a box that tells you which Pattern sheet you want  and what colour the outline of the pieces will be.  It also shows you the pieces and the number that they are allocated on the sheet .  Below you see the information for my chosen garment (plus some pencil notes of simple lengthening amendments I intended to make to the pattern).


So I need to locate pattern sheet B, with a red pattern line, pieces 21 to 23 for style 106 with the type of line marking used for size 36.  Below is the confusion with which you will be faced (this is sheet B and the pieces shaded completely in pink are the ones for a featured garment in the magazine, unfortunately not the one I chose).
But persevere.  Once the pieces have been located I use highlighter to go over the lines of the size that I want and to highlight any pattern markings, such as grainline, notches etc.  You can see the outline of the first piece for my dress highlighted in pink  across the bottom of sheet B.

Here in the picture below  the pattern markings are highlighted.  You can see I am highlighting piece 22.  Should you decide to make another garment using the same pattern sheet make sure you use a different colour highlighter to highlight that pattern.


I highlight each piece one at a time and then trace it before going on to highlight the next piece.  To trace I use ordinary greaseproof paper, cheap and easily obtainable from supermarkets.  The drawback is the limited width but you can always tape a bit on if  the width is insufficient.  When tracing I find it useful to put something solid on which I can rest my tracing hand, this both helps to stop my hand from shifting the paper and provides an extra weight to keep the paper and pattern in place.  My grader's set square is ideal for this, see the picture below.


Below is the traced pattern on which I have marked details such as fold line, gathering points etc. and size, model number and which issue of the magazine it came from as I shall add it to my file of traced patterns in case I wish to use it again.


Patterns in the Burda Style magazine do not have seam allowances included so you have to add them yourself where necessary.  This does mean that you can choose the seam allowance you want, narrower or wider than the standard 1.5 cm for seams and the depth of hem allowance you require.  I use the grader's set square to mark the seam allowance for any straight lines and a seam gauge,as below, to mark the allowance on curves.

Then, at last, I have my pattern pieces complete and ready to cut out with paper scissors before laying on my fabric.  All this took one and three quarter hours, although that does include stopping to take even more photographs of the process than you see here.  And then I went for a tea break, as I am about to do now.  Part 2 to follow later.


Saturday, 17 May 2014

Sew-along: a simple one metre item from stash fabric

Hello,

Many of you that have met me already through the LDC meet-up know that I love a good sew-a-long. This is my progress on the most recent 'a simple item from stash fabric' challenge.

As soon as this was announced on the meet-up group I knew that I was going to make another version of Simplicity 1884. This was perfect for the challenge for a number of reasons: -
  • The top only required 1 metre of fabric (win!)
  • It didn't require any additional notions such as zippers, buttons etc. 
  • It is an easy pattern and quick to make


One thing that I always have to bear in mind when I am doing sew-a-longs is whether or not I will be able to finish the project within the given time. Not that it matters if I don't finish it by the end of the sew-a-long, being motivated by to start a project is always exciting. However, the timescale is good practice for me when it comes to time planning, and it helps me when I am sewing projects to wear for a particular event, for example a work event or special occasion where the deadlines are more crucial. 


The fabric was picked up from a shop on Brick Lane (I can't remember what it was called but it was towards the Aldgate end) and only cost £3.50 per metre. This fabric had been in my stash for a while and although I knew that I wanted to use it for a top it always got pushed to the bottom of my priority list. I am delighted that this sew-a-long has made me do some impromptu stash busting!

Do check out the meetup page for this challenge to see what other LDC members are working on. It will also be great to hear what other ideas people have for 1 metre projects. 

Good luck with the challenge and don't forget to upload some pics so we can all see your 1 metre progress and projects!

Happy Sewing!


Sunday, 23 March 2014

Goldhawk Road fabric shopping

A good dozen or so of us went fabric shopping today on Goldhawk Road in Shepherds Bush.  And a lot of shopping was being done!  There seemed to be almost too much fabric to make an informed choice - there certainly are a lot of shops.

We went to the Bush Theatre cafe/bar afterwards - such a welcome chance to rest our weary feet.  It also offered the wonderful opportunity to see and admire what we all bought.

There were such lovely fabrics and trims on show that a few of us started to seriously consider going back and buying more!

I'm glad to say that I didn't, but I'm also a little embarrassed to say that I bought more than the two fabrics I wanted. Now we all knew this would happen, right?

My one comfort is the thought that I have projects in mind for each of them.  Which made me think that a blog post would be great about what we are all hoping to make with our purchases today.

Here go mine, please feel free to add your project plans in the comments, or send me an email so I can send you your invite to contribute directly to the blog (we are hoping that all LDC members want to contribute, either via posts or in the comments)


At A One Fabrics I bought a dark blue wool - I am hoping to make this a straight skirt for winter.  If I make it soon I should be able to decide if I want a jacket in this, so I can go back and buy more.  Right now I only have one metre because it was rather expensive.  I really wanted a thicker fabric for a skirt, this was one of the planned purchases.

I also got a blue on blue batik fabric in the same shop for a sleeveless summer top.

The second fabric I wanted was a mid grey to make a bias cut top to go under a see-through lacey blouse. Success!  Two metre for £2 each, bargain!

I liked this fabric so much that I also got another two metres in a purple - maybe a cowl neck sleeveless top?

The same place also had a loosely woven cotton or linen in a light pink.  The exact shade I was after to make some bunting with that I wanted to make for some time.  I just need a bit of grey and navy fabric and I'll be good to go!

And finally I couldn't resist a black and white linen to make a second tunic out of.  I bought a very similar linen fabric in a big floral pattern from the same place some time ago and regretted not having bought more: this is just so lovely to wear!


Funnily enough Emma happened to buy the same fabric - it'll be really good fun to see what we each make with it.

What did you buy, either on our shopping trip or elsewhere - and what are you hoping to make?  It would be lovely if you add your ideas and plans in the comments, or put them up in a seperate blog post.  Just send me your email address and I'll send through the invite so you can post directly.