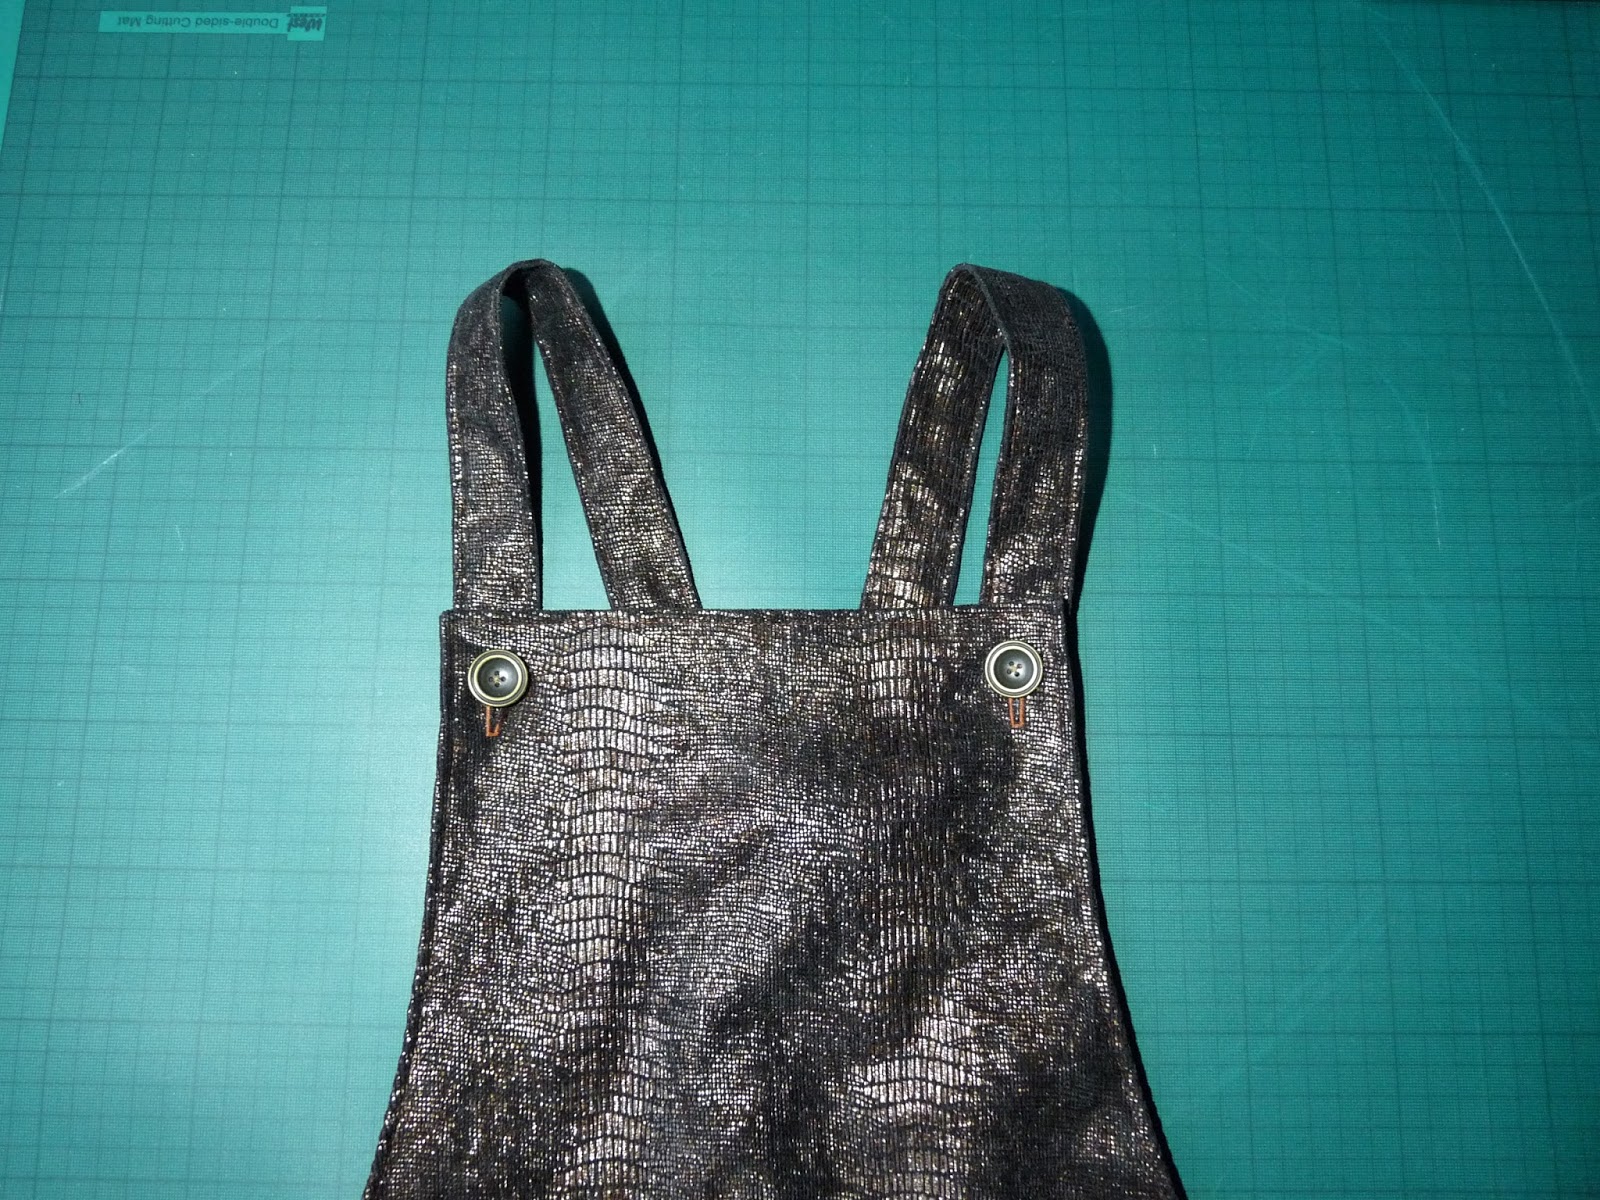
I was so pleased with my first version, like so many other sewing bloggers, that I decided to go ahead and make another, learning from my original effort. and making a few changes.
The fabric was a faux snakeskin in a bronze colour with a sheen, purchased about three years ago for a pittance at 34 Market Row, Brixton. I did away with the centre front and centre back seams, as such seams would detract from the effect of the fabric, and added some length.
To leave some walking room, as I was making a longer version, I left slits at the bottom of the side seams but rounded the side edges for a shirt tail effect.
I also drafted new hip pockets with rounded bottoms echo that hem style.
I fully lined the dress and applied the fusible interfacing to the inside of the lining. Below you can see the inside back of the Cleo.
The lining was from the Sewing and Craft Store by Tooting Bec tube station and was such a gorgeous purpley bronze colour that the photograph doesn't do justice. I would love to use it to make something you can see, it's ex-Jigsaw and so soft and smooth. The buttons, which have an unusual concave shape, came from Simply Fabrics, Brixton.
Unfortunately I can't take a photograph of it being worn as I have no "volunteer" photographer to hand today. I cannot even take one of the dress on my Adjustoform Tailor's Dummy as the shoulders are too wide to get the dress on it. This just shows that, helpful as they may be, these type of dummies cannot reproduce you exactly, I always have to do a narrow shoulder adjustment to garments I make. The best I can do is below.
I have enthused before, in the previous parts of this particular blog, about this pattern. Not only is it easy to make and has no zips, darts, gathers or pleats to contend with but it is takes very little fabric and could be a stash buster, especially if you do a short version, - imagine it with contrast pockets and straps, using two fabrics, maybe two different colour denims, and dividing it horizontally, vertically or creating panels. Let your imagination run wild! One day there may even be a part 4 to this blog if I make another.
Have you made a Cleo? We would love to see a photograph of it in our Member's Makes Photo Album on The London Dressmakers Club Meetup site.
Subtitle
. . . . . . A place to contribute, exchange tips and ideas and find further info on the LDC group on Meetup.
Showing posts with label Simply Fabrics Brixton. Show all posts
Wednesday, 11 January 2017
Sunday, 22 May 2016
Sew your own luggage
I am about to fly with Ryanair to Italy with my partner to walk the Grande Anello dei Sibillini
Doing the trek means that I and my partner have to carry everything with us in a rucksack, a total of two and a half weeks worth of luggage as after, I hope, completing this trek I will be doing some sightseeing and relaxing. We are only taking cabin luggage so we have one rucksack each within the size limit of 40cm x 55 cmx 20 cm. We are not camping, thank goodness, but have booked a place each night in a rifugio or albergo, all of which provide hearty meals.
Ryanair now allow you to take an additional bag, as well as your main cabin bag, into the cabin provided it is no bigger than 35cm x 20cm x 20cm. When I went to Italy in 2015, to sightsee with my Canadian cousin, we flew with Ryanair and I made a fabric handbag from some furnishing cotton to these dimensions to use for a day's sightseeing.
It has an outside pocket to the front and back, closed with a snap fastener, and long straps so that it could be carried over the shoulder. There is a central tie across the middle of the width of the bag, which helps to keep the contents secure, but it is hard to make them out in the above photograph. It could easily take a towel and costumes for the beach etc. I designed it so that it could also be carried in the hand by knotting the fabric straps.
There are two further sets of ties, which are discernible in the above photograph that, once tied, form a gusset at either end of the bag, making it more compact in size.
For the impending holiday I decided to make as the second cabin bag a small drawstring bag that could be worn like a rucksack . I had some waterproof fabric that I used as the outer fabric. Although this bag is not intended to stand up to torrential downpours I did want it to have resistance to a certain amount of rain. For the base I cut a square, 20 cm x 20 cm, for the back panel a rectangle 35 cm x 20 cm and for the remaining sides a long strip 35 cm x 60 cm. A 1 cm seam allowance was added to all these dimensions. I also cut a large circle to form a flap over the top and strips to form the channels for the drawstring cords to run through at the top and as tabs to hold the cords at the bottom of the bag.
Sewing was very straightforward, joining the panel for the sides to the back panel, sewing the tabs at the bottom of the bag into the seams at the same time, and then sewing the body of the bag to the base. I made a lining mainly out of some fabric I had abandoned from a failed project but, as I did not have enough of this for the back panel, also from some leftover white toile fabric. I ironed some stiff fusible interfacing to the back of the lining base and put two pockets, left over from the failed projects, on the back panel lining. Here's the lined inside of the bag.
I found it difficult to photograph the inside but I hope you get the idea. Then I sewed the lining and outer together when I stitched the channels for the drawstrings over the top edge, I think you can just about see these channels in the photograph above. The photograph below, with the drawstrings in position and the flap sewn on, should give you an idea of the construction. Everything used was in my stash except for 2.5 metres of nylon cord at 30p a metre from Simply Fabrics in Brixton.
And now here it is in action.
Want to know what's in it? I spread the contents out on the table so you can see, the list is below.
Doing the trek means that I and my partner have to carry everything with us in a rucksack, a total of two and a half weeks worth of luggage as after, I hope, completing this trek I will be doing some sightseeing and relaxing. We are only taking cabin luggage so we have one rucksack each within the size limit of 40cm x 55 cmx 20 cm. We are not camping, thank goodness, but have booked a place each night in a rifugio or albergo, all of which provide hearty meals.
Ryanair now allow you to take an additional bag, as well as your main cabin bag, into the cabin provided it is no bigger than 35cm x 20cm x 20cm. When I went to Italy in 2015, to sightsee with my Canadian cousin, we flew with Ryanair and I made a fabric handbag from some furnishing cotton to these dimensions to use for a day's sightseeing.
It has an outside pocket to the front and back, closed with a snap fastener, and long straps so that it could be carried over the shoulder. There is a central tie across the middle of the width of the bag, which helps to keep the contents secure, but it is hard to make them out in the above photograph. It could easily take a towel and costumes for the beach etc. I designed it so that it could also be carried in the hand by knotting the fabric straps.
There are two further sets of ties, which are discernible in the above photograph that, once tied, form a gusset at either end of the bag, making it more compact in size.
For the impending holiday I decided to make as the second cabin bag a small drawstring bag that could be worn like a rucksack . I had some waterproof fabric that I used as the outer fabric. Although this bag is not intended to stand up to torrential downpours I did want it to have resistance to a certain amount of rain. For the base I cut a square, 20 cm x 20 cm, for the back panel a rectangle 35 cm x 20 cm and for the remaining sides a long strip 35 cm x 60 cm. A 1 cm seam allowance was added to all these dimensions. I also cut a large circle to form a flap over the top and strips to form the channels for the drawstring cords to run through at the top and as tabs to hold the cords at the bottom of the bag.
Sewing was very straightforward, joining the panel for the sides to the back panel, sewing the tabs at the bottom of the bag into the seams at the same time, and then sewing the body of the bag to the base. I made a lining mainly out of some fabric I had abandoned from a failed project but, as I did not have enough of this for the back panel, also from some leftover white toile fabric. I ironed some stiff fusible interfacing to the back of the lining base and put two pockets, left over from the failed projects, on the back panel lining. Here's the lined inside of the bag.
I found it difficult to photograph the inside but I hope you get the idea. Then I sewed the lining and outer together when I stitched the channels for the drawstrings over the top edge, I think you can just about see these channels in the photograph above. The photograph below, with the drawstrings in position and the flap sewn on, should give you an idea of the construction. Everything used was in my stash except for 2.5 metres of nylon cord at 30p a metre from Simply Fabrics in Brixton.
And now here it is in action.
Want to know what's in it? I spread the contents out on the table so you can see, the list is below.
Goretex hooded rain jacket, purse, torch, mobile phone, First Aid kit,box of plasters,washbag of toiletries, knee length shorts, 2 pairs of hiking socks,2 bras, 4 pairs of knickers, 1 pair of sandals, long-sleeved cotton t-shirt, fine wool polo neck sweater, V-neck pullover and a 2 cm thick book. I could have squeezed a bit more in even but I don't intend to load it like that in real life. I just thought it would be interesting to see how much I could get in it. The measurements when thus loaded are about half a centimetre inside the Ryanair requirements.
When not in use the bag folds up and I have photographed it on top of a sheet of A4 paper.
It is folded into a polythene bag but, at some point, I think I will make a pouch for it, maybe using some more stash !
Subscribe to:
Posts (Atom)