Subtitle

. . . . . . A place to contribute, exchange tips and ideas and find further info on the LDC group on Meetup.

Showing posts with label Sewing & Craft Superstore Tooting Bec. Show all posts

Wednesday, 1 November 2017

Christmas Fabric for Gifts and Garments

Are you thinking of Christmas gifts and outfits?  With this in mind I thought I would show you some of the fabrics available at a shop near my home.  It is the Sewing and Craft Superstore, 292-312 Balham High Rd, Wandsworth, London SW17 7AA, just 1 minute from Tooting Bec tube station.  This is part of the downstairs area and you can't see the little side sections, what's behind me and the upstairs section with silks and satins.  What follows is a quick browse first thing on Saturday before the shop filled with customers and some ideas, mainly stolen from other people, of simple items to sew..

Here are some of the things that caught my eye and wouldn't break the bank.
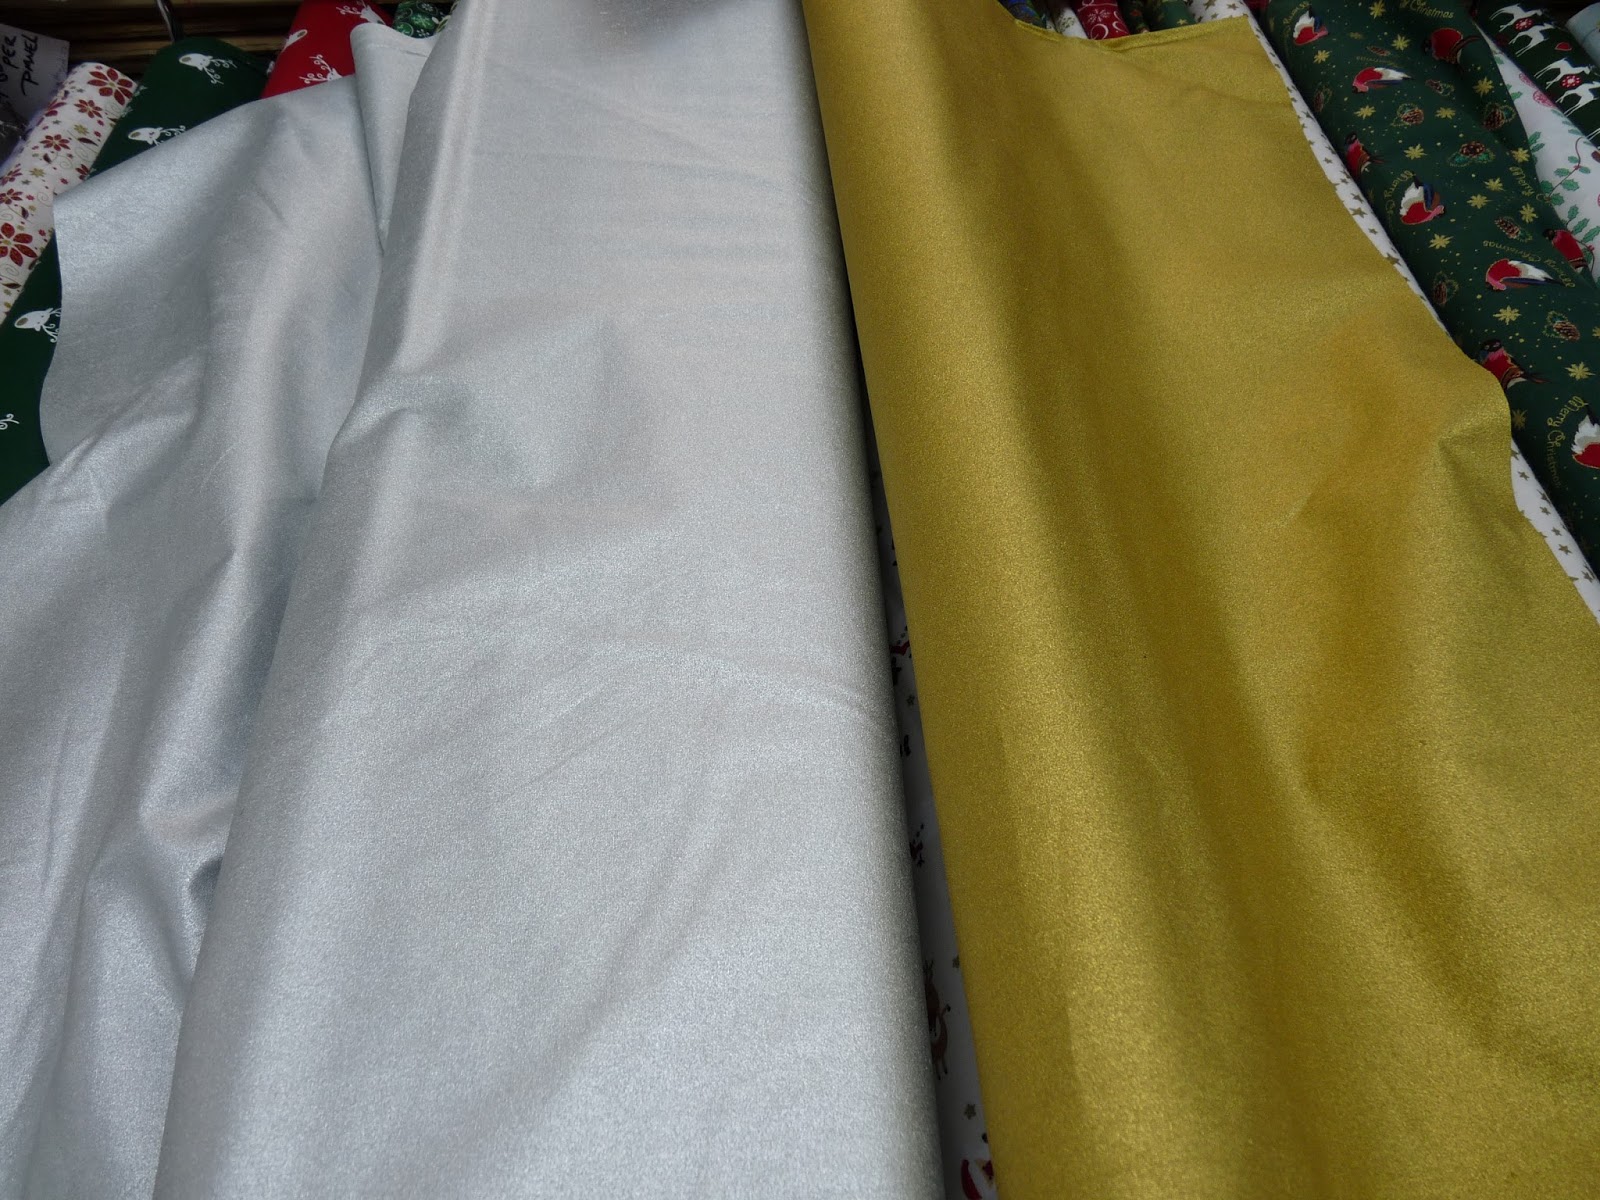
Items for the festive season don't have to shout CHRISTMAS.  A bit of subtle glitter makes things appropriate beyond Yuletide.  Here are two 100% cotton fabrics  140 cm wide at £6.99 a metre, one with a gold sheen and the other silvery, that would make nice skirts to be dressed up or down.

How about a  simple top or bustier in these star spangled fabrics below?  These come in white or grey with silver stars and red or green with gold stars at the same width and price per metre as the plain gold and silver above.


There is currently a Half price sale of patterns by McCalls (until 4 November) and Simplicity (until 28 November) at this store and in pattern shops elsewhere.  So it might be the opportunity to buy This peplum top   that I think would look striking made up in the sleeveless version using one of these star fabrics.  Another pattern that is tempting me is this knit top  with 3 different versions.  One version, version C, takes only half a metre and all versions are very quick to make.  There is a video by Brittany J Jones in which she demonstrates how to sew version C, plus how to match stripes if you are using striped fabric

I would use the fabric below to make version A or B but that is purely because I am beyond the age to get away with  a cropped top with Bardot neckline.  The fabric has much more of a golden look in reality, it is a polyamide mixture stretch 145 cm wide and priced at £7.50 a metre.


As for a skirt to go with it my fancy would be for this laser cut scuba, 150 cm wide and £7.50 a metre.  For modesty you could make a simple waist slip to wear underneath, just a tube of fabric cut to the width and length you want with the top folded over to form a tube through which to thread an appropriate length of narrow elastic.


You could use the same waist slip base to create a foundation for a fairy tale skirt of many layers from these gorgeous organzas or tulles.


And what about this floral corded lace, scalloped at both selvedges.  It comes in white,pink, grey and gold , 130 cm wide at £9.99 a metre.  I wish I had an excuse to use it, it would make a gorgeous overlay to any garment.

That's enough of selfish sewing and on to the many fabrics suitable for sewing easy to make Christmas gifts.  These two cotton prints below are my personal favourites for an apron because I'd hope the dark colour and busy print would disguise any cooking splashes (well, that's the reason for wearing an apron and not just to look super cute and a cooking ace).


Sturdy tote bags are always a popular gift and there are a selection of heavier weight fabrics.  Here are my two favourite winter themed ones that would still look good at any time of the year.  These are 150 cm wide and cost £7.99 per metre.

For lighter weight bags, again going with something Christmassy but which would not look out or place at other times, here are two that I favour.  They are 135 cm wide and cost £6.99 per metre.


There are plenty of tutorials and patterns on the Internet for making bags.  Have a look at these  10 free patterns from the Craftsy blog.  Of course, you may be making your bags from left over fabric you already have but if you need any haberdashery items such as clasps, ready-made handles then you can get them at this store.
I find it much more difficult to get ideas of things to make for men and boys but I have had success with drawstring knapsacks  Here is a tutorial to make a drawstring knapsack.  I made mine using a  lining made from shower curtain material as the recipient wanted a bag that was waterproof on the inside for carrying damp towels and swimming clothes from the gym.  This shop also has a selection of cords and tapes suitable for creating the drawstrings. 


Last Christmas I made a number of the zippered pouches shown above.  This one was intended for a female and the ones for males had rather boring stripes; I wish I had found some fabrics like those below that I could have used to reflect their interests.
 
There are lots of tutorials to make this type of pouch, there is one on Jessalli Handmade's channel   that is very quick to make.  I added a cord pull to my zip to aid zipping and unzipping and a top-stitched tab at one end, that you can just about see in the picture, to enable it to be hung up if wished.
And talking about relating fabrics to the recipient's interests, how about gifts for us sewists.  There are plenty of sewing themed materials in the store and these two below are my favourite.  These are 100% cotton, 112 cm wide and £5.99 a metre.


As for ideas as to what to make for Sewists, The Sewing Directory site has a special Sewing Accessory Projects section in their fabulous Free Projects.   This is full of gift making ideas and well worth browsing.
I am going to make this my last suggestion, though there is so much more I could add.  There are some faux furs, both of the fun and the realistic sort.  The most expensive (that's the realistic ones) are £16.99 a metre and would make a sumptuous scarf or stole, just sew a lining to the back of the "fur"and "Voila!", the look of luxury at a pittance.

Have you a fabric store near you that you would like to recommend?  Would you like to share any suggestions for Christmas gifts we could sew?  Please let us know in the comments below or comment on the  Club meetup site on the Christmas Gift Sewing event I have just put on.

Saturday, 17 June 2017

Once upon a time in Jaipur- Part 3 The Balotra ghaggra.


While in Jaipur, visiting the Anokhi Museum of Hand Printing, I was introduced to the means of divining the status of a native of the area of Balotra by the fabric of the traditional clothes that they wore.
Anokhi are a company who aim to promote, support and encourage traditional means of creating fabric designs, both in historical and contemporary styles.   At the Museum there were fascinating displays of fabrics, both old and new, shown as lengths of cloth or made up into clothing.  Craftsmen demonstrated the making of printing blocks and the printing of fabric.  Exhibits explained the often very complex techniques used to create multi-coloured fabrics.
Of course there is a museum shop selling fabric, clothes and the beautiful paperback books that Anokhi produce about various aspects of traditional fabric.  I bought "Balotra, the complex language of print".  All these books have marvellous photographs and actual fabric samples in them.

 Included  in the book were instructions on exactly how to cut a ghaggra skirt.

And, amongst the hand-printed fabric in the shop, was the very design illustrated.  Immediately I knew that  I wanted to make this skirt.  Traditionally the skirt is full length and requires at least 5 metres of fabric but I knew that this was not practical for me so I decided on just below the knee.  With the help of the shop staff  we worked out that I needed 3 metres.

The various fabric designs convey different messages about the status of the wearer.  Some can only be worn by young unmarried girls, some only by married women, some only by widows, others are worn only by natives of a particular tribe of the region and some only by people of a certain trade- potters, iron workers etc.  Thus you could look at the clothes worn by a woman and see that she was a widow of a particular tribe.
The fabric shown above can be worn by any woman but it is the decorative edging that conveys their marital status, the wide red border with yellow piping means that the wearer is a married woman whereas a very thin red border meant a widow.  I am not married but do have a long term partner but there appeared to be no traditional way of communicating this via fabric.
The way the fabric is cut gives very little wastage, needs no pattern and only requires cutting in straight lines.  First the fabric is cut into sections the length you want the skirt to be, this is the stage shown in the picture above. Each section is folded in half selvedge to selvedge and you make a diagonal fold across the fabric a short distance in from the corner.  Then you cut down that fold- see below.

  From this folded section of cloth you will get 4 kalis (panels) as you see below.

These are then sewn together with the narrowest sections at the top.  Below are the four joined kalis from one section of cloth. You can see that an interesting chevron pattern is formed at certain points.
In total I had 16 kalis to join, below you can see 8 of them shown from the wrong side.  The carpet was the only place I could find where there was enough room to spread it out.

The waist is formed by creating a channel through which a cord can be threaded, drawn up and tied at the side of the ghaggra.  Traditionally this is red and I found a lovely bright red at Wimbledon Sewing and Craft Superstore- thank goodness I live not far from this shop.  I simply stitched a length around the waist, folded it over and stitched it again to create a tube.  The drawcord was made from some yellow, red and black striped ribbon in my stash.  To stop the ribbon disappearing into the channel when not tied I created loops of beads and red dyed bamboo from my stash and knotted these to the ends of the ribbon.  I had seen examples of the end ties of such skirts being embellished with beads in some of the museums that I visited in India.

I pondered as to how I should indicate my status and decided to create my own symbol, which was to put 3 lines of red top stitching just above the hemline.  This also saved me hours of hand stitching the hem.
So here are some more photos of the finished result.

You can get carried away with twirling!
If anyone would like to make a skirt in this manner I can send a better copy of the brief instructions, just ask in the comments section below.

Wednesday, 11 January 2017

Tilly & The Buttons Cleo Dungaree Dress Part 3- In which I sew another version.

I was so pleased with my first version, like so many other sewing bloggers, that I decided to go ahead and make another, learning from my original effort. and making a few changes.
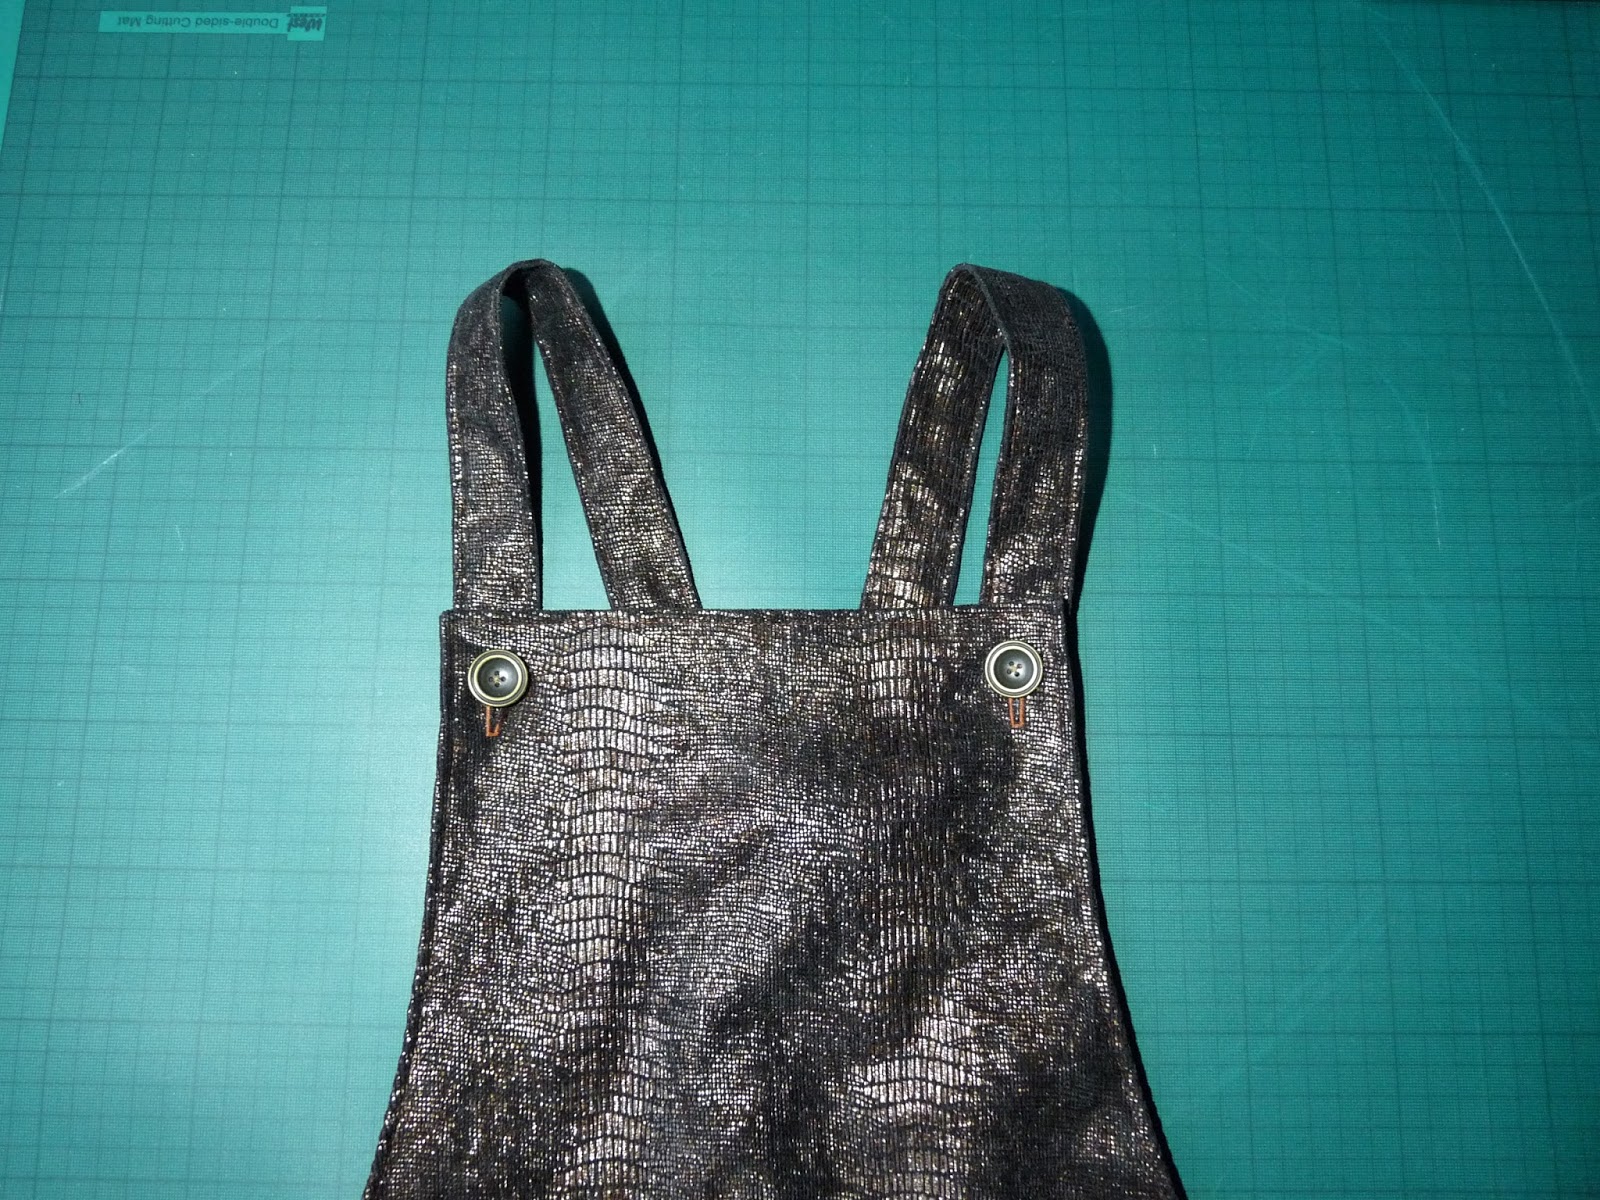
The fabric was a faux snakeskin in a bronze colour with a sheen, purchased about three years ago for a pittance at 34 Market Row, Brixton.  I did away with the centre front and centre back seams, as such seams would detract from the effect of the fabric, and added some length.

To  leave some walking room, as I was making a longer version, I left slits at the bottom of the side seams but rounded the side edges for a shirt tail effect.

 I also drafted new hip pockets with rounded bottoms echo that hem style.


I fully lined the dress and applied the fusible interfacing to the inside of the lining.  Below you can see the inside back of the Cleo.

The lining was from the Sewing and Craft Store by Tooting Bec tube station and was such a gorgeous purpley bronze colour that the photograph doesn't do justice. I would love to use it to make something you can see, it's ex-Jigsaw and so soft and smooth.  The buttons, which have an unusual concave shape, came from Simply Fabrics, Brixton. 


Unfortunately I can't take a photograph of it being worn as I have no "volunteer" photographer to hand today.  I cannot even take one of the dress on my Adjustoform Tailor's Dummy as the shoulders are too wide to get the dress on it.  This just shows that, helpful as they may be, these type of dummies cannot reproduce you exactly, I always have to do a narrow shoulder adjustment to garments I make. The best I can do is below.
I have enthused before, in the previous parts of this particular blog, about this pattern.  Not only is it easy to make and has no zips, darts, gathers or pleats to contend with but it is takes very little fabric and could be a stash buster, especially if you do a short version, - imagine it with contrast pockets and straps, using two fabrics, maybe two different colour denims, and dividing it horizontally, vertically or creating panels.  Let your imagination run wild! One day there may even be a part 4 to this blog if I make another.
Have you made a Cleo?  We would love to see a photograph of it in our Member's Makes Photo Album on The London Dressmakers Club Meetup site.

Wednesday, 29 June 2016

Sewn in One Hour- Not! And a Re-fashion

This pattern, New Look 6483, came with the June 2016 edition of Sew Magazine.
It looked the answer to many a sewer's prayer- a simple top in woven fabric with neckline variations and a sleeveless or short sleeve option- plus the promise of a swift sewing time, one hour, as it had no zip to insert or buttonholes to make.
My partner, Nick, was keen for me to make it in the same fabric that I used for my carry-on luggage rucksack blogged here but I drew the line at wearing a garment in bright yellow with multi-coloured spotted and striped ponies cavorting on it.  However I did want something cheerful so went for this poly/cotton at only £2.99 per metre from the Sewing & Craft Superstore at Tooting Bec.
I bought 1.60 metre as I wanted to make version A but with longer sleeves and possibly a matching headscarf. 
I traced a size 10 (83 cm bust) using horticultural fleece as described here
and pinned the pieces together to check for fit.  Since my bust is just under 85 cm I thought that I might have to make an adjustment here but it was a perfect fit across the bust with just the amount of ease that I wanted.  However I did make several adjustments to the pattern before cutting out the fabric, due to my narrow shoulders, thin arms and rounded upper back, as follows:
1. Decreased the height of the armhole by sewing a larger seam allowance on the shoulders and decreased the size of the sleeve cap to match by making a horizontal pleat on the pattern across the sleeve head.
2. Extended the length of the sleeves to below elbow length by continuing the line of the original short sleeve pattern to the appropriate length but tapering the sewing line to create a slightly narrower sleeve.
3. Put a dart in the back of the neck so that it fitted my rounded upper back and amended the back facing pattern to take account of this.
4.  Instead of using one large button for the closure of the back neck opening I used two tiny ones as I thought it gave a neater look.  The button loops are hand stitched using red thread.
The photograph below shows the fastening and the back neck darts.
So how long did it take to sew?  By sew I mean actual machine stitching time- stay stitching, basting the sleeve head to gather for sleeve insertion, edge overcasting, sewing the seams and top stitching (which I did on the bottom and sleeve hems and around the back neck opening).  Definitely more than an hour.  I am not a fast sewer but I note that reviewers on Pattern Review also mention that it took them more than an hour.
 However, if not as speedy as claimed, it is easy and not a long project.  I like it very much and a complete stranger came up to me yesterday saying how much she liked it and was disappointed to discover it was not a RTW buy!  It can be worn loose or tucked in and goes with loads of separates already in my wardrobe.  The naive fabric design brings a smile to my face when I put it on, something much needed given Brexit and the dismal, dull weather we have been having.  I am already thinking of another version, with a different neckline and  longer sleeves, using fabric from my stash.
This fabric also inspired a refashion of a fleece pullover that I had.  Although it was a useful item, I found it annoying that it had no front opening so the only options were Fleece on or Fleece off.  I could get too hot wearing it but then become too cold when I took it off.  While I was in the store buying the fabric for the top I spotted, in one of their zip offer bins, an open-ended zip that was the same blue as the fabric and exactly the right 25 inch length at only £1.50.
To make the jumper into a jacket I just cut up the middle of the front of the fleece and stabilised the underside of the front edges with a narrow strip of  light-weight fusible interfacing before turning the edges under on either side of the zip and sewing the zip in.
 I used some horticultural fleece to trace off the underside of the little stand-up collar and created a facing pattern to cut out in the boat fabric.  Then I hand stitched the facing in place.  Eh voila!, a zip-up jacket that I can just unzip for a bit of a cool down.  Plus it makes a rather dull fleece a bit more exciting and individual.  My tame photographer had to leave for work so you don't get to see me wearing it but here it is.
But the best bit is the inner collar.
Costs for top and jacket refashion - Fabric £4.98, Zip £1.50, The white, the blue and the red sewing thread, fusible interfacing for the facings and the buttons all came from my stash.  Total £6.48.

Have you made something that puts a smile on your face when you wear it?  Tell us about it on this blog, contact Giselle, London Dressmakers Club Organiser through the Meetup site here
for information on how to write a post for this blog.

Thursday, 16 June 2016

A 2 Day workshop on Patchwork and Quilting for Beginners.

At the beginning of April I happened to be in Devon when the Exeter Quilt Show was taking place and, loving all things fabric as I do, I was unable to resist its lure especially as I had decided to try to make a very simple single bed quilt to use up some of the fabrics left over from my dressmaking attempt.
A conspicuous amount of  imagination, hard work and patience had gone into making the items on display and I could see that it demanded more than sewing a few bits of fabric together to create a satisfying quilt.  Thus I signed up for this 2 day workshop, run by The Exeter Sewing Machine Company ,to make a mini-quilt and intended particularly for Beginners.  I was so glad that I did as I learnt about many aspects that I had not considered at all. This sample 24" x 24" was roughly what we students aimed to produce using our own choice of fabrics.

 Day 1. As requested, I arrived on the first day at 9.45 am for a 10 o'clock start clutching the only items that we were asked to provide- 4 "fat quarters" for the body of the quilt and 25 cm of fabric at least 110 cm wide for the binding plus a packed lunch.  All the fabric had to be 100% cotton and well-pressed (the instructions were very explicit) so as not to waste working time removing creases.  All other materials and all tools were provided.  The workroom was light and airy.  Each work station had its own Brother 1000 machine, large cutting board, iron and ironing surface and all the necessary equipment.  There were 4 of us at the workshop and, after settling at our work stations and finishing the coffee or tea provided, we were ready to go.  The tutor, Jenna Clements, was excellent, taking us in clear and logical steps through all the processes.
First of all, Jenna took us through topics such as types of fabrics to use, colour selection, the reasons for and against pre-washing the fabric, measurement and seam allowance while we all made notes. Looking at the sample mini quilt, we had the opportunity to think how we would place our own fabrics in relation to one another when constructing the blocks for our own mini-quilt.  I had brought along 5 fat quarters, one more than required, as I had been given one fat quarter for turning up dressed in vintage style at the 70th anniversary of the Sewing & Craft Superstore in Tooting Bec.  I decided to use all five in my quilt while another student went with just two for her design.
Then we learnt how to remove any selvedges and accurately cut on the straight grain to exact measurements using a rotary cutter and cutting mat.  I was really pleased to learn this technique and realised that I had not been successful in my previous attempts at using a rotary cutter because I was not doing it correctly.
The next step was to sew our cut fabric into blocks and, before we tackled this, Jenna explained what type of machine foot, needle, choice of thread and best stitch length to use.   To avoid adding bulk you must not back stitch when sewing the seams and you have to start at the very edge of the fabric.  This means that the feed dogs behind the needle are exposed and this can cause fabric to be dragged down into the feed dogs.  You can see what I mean in this picture, I have lifted the foot so you can see the feed dogs exposed.

To avoid the fabric being caught up in the feed dogs you can place a scrap of spare fabric over the feed dogs and immediately abutting the fabric that you are going to sew (as in the photograph below) - a useful tip that you may well be aware of but which was new to me.

 Using the correct method of pressing of the sewn block is very important to ensure a successful result.  Seams are not normally pressed open, as in dressmaking, but to one side. It does mean that you have to think carefully how the blocks will be sewn together so that you press the seams to avoid bulk where two seams meet by making sure that the seam of one block has been pressed to the right and the seam of the block to be sewn to it is pressed in the opposite direction.
This brings us on to the all-important "matching of points", that's where seam lines meet.  Apparently the accuracy of the matching is one of the key factors by which the standard of your work is judged.   Many points can occur on a large quilt.  Fortunately I only had to match five points in my mini quilt.  See if you can spot them, they are the points where four seam lines meet and the junction of those seams should be exact.  The joy I felt on achieving my first correctly matched point was enormous.
 By the end of the first day at 4 pm we all had the main section of our quilt sewn.  Here's a photograph of another student's work, she  decided to make her quilt as a linear runner instead of a square.  I love all those dramatic blues.

If you had not finished or wanted to redo a point that had not quite matched, you could stay on, as the shop remains open until 5.30 pm, but I went to explore the fabric section in the basement and the haberdashery on the ground floor, plenty of scope for shopping there.  However the thought of having to carry it all back to London on public transport helped me resist and not break my "No more fabric buying" resolution yet again.

Day 2.  Overnight the tutor had tacked wadding and backing fabric to our quilt fronts  ready for us to to begin the day and crack on.  So that we would understand this process Jenna explained the different types of wadding available, their uses, advantages and disadvantages and various other details about wadding, such as the maximum distance apart for quilting lines appropriate to each type.  This lead to an explanation of how to construct a quilt "sandwich" (the top, wadding and backing) and how to correctly tack it together preparatory to quilting.  Below you can see the 3 layers of my quilt before it was trimmed.
And here, on another student's piece, you can see how the whole quilt is tacked to secure the 3 layers together so the fabric is held in place while you machine stitch the layers permanently together.  This one is destined for a grandchild. The pigs are so cute.

Before we got down to sewing we needed to trim the wadding and backing to size with rotary cutters while using the quilting ruler to "square" the quilt i.e. making sure that the side edges were parallel and the corners at right angles. Luckily I must have been accurate with my cutting and sewing (an unusual occurrence for me) as my deviation from the required shape was so minimal as to have no need for correction since it would be hidden by the binding to be applied later.
To machine quilt the 3 layers together we used a "stitch in the Ditch" type technique using a walking foot and following the seam lines of the patches though not right on top of that seam but immediately to one side by an infinitesimal amount.  This means that, actually, you can't see the machine quilting on the right side but it is there, securely holding the layers together.  It was a slow process for me, needing concentration to keep the needle stitching in the correct place.  Jenna taught us an incredibly neat way of fastening off the stitching so there are no signs of stopping and starting on the front or the back.  If you look at the photograph below I hope that you can only just see the machine stitching, although the tacking is plainly visible.

I had hoped that we would do some visible machine quilting but there was insufficient time.  Jenna described some simple quilting effects and how they were achieved and discussed tools for marking out designs.  We pressed on to cut strips of fabric for the binding for the edges.  To make the necessary length we joined our strips with a machined seam on the diagonal so the bulk of the seam would be distributed when it was folded over.  This photograph below shows the diagonal sewing line I have marked on my strip,  once that was sewn I had a long straight strip.

This strip was folded in two along its length and a diagonal point created. 
This folded strip was laid around the top of the right side of the quilt with the raw edges of the quilt and the binding strip aligned and mitred at the four corners.  Then the strip was stitched to the quilt a quarter inch from the edge.
 The binding was folded in half to the back side of the quilt and, our time being up, we would be able to finish the quilt at home by hand stitching the binding down on the wrong side or machine stitching on the right side along the join of the binding and the quilt body. I had to leave my quilt behind in Devon to be continued next time I visit but I roughly pinned the binding in position to take this photograph, which gives you some idea of how the finished item will look.
I can see plenty of faults with it but I am quite pleased with this first effort.  I think I might try hand-quilting something simple on the four cream squares but I will wait until I have finished the binding before deciding on this.
One of the things that I liked so much about this course was the amount of information about tools and techniques so one understood not just how to do something but also the reasons why you did it and what other options were available.  I was able to comprehend the techniques to a greater degree than I would have done by reading a book in quilting.  It certainly taught me the importance of accuracy  and also some processes that I can use in dressmaking.  
Exeter is a very interesting city and there is beautiful countryside around it.  Should you be thinking of taking a long weekend break you could consider Exeter and combine it with one of the workshops run by The Exeter Sewing Machine Company. Honestly, I am not being paid for this!
I am now looking for some good dressmaking workshops that I would be able to attend  as I can appreciate how they can improve your skill.  Is anyone able to recommend some?  Do add a comment with the details if you have attended a workshop that you can vouch for and would like to bring to members' attention.
Happy Sewing, Barbara.