I made version B because I didn't have enough of the blue fabric for version A (longer, without the ruffle). I would have liked to angle the pockets inwards a touch more and would do that if I did this with two pockets again.
The top of the pocket folds in. Depending on what the revers of a fabric looks like, I could also fold this out and under a little, and sew across before attaching to the dress. It is fine like this though.
I started out with two even sides along the back slit. By the time I was done, the left-hand side was a touch longer. This has happened to me before and I don't quite understand it. Perhaps I did slightly different seam allowances on either side when attaching the facing? Otherwise this is very odd indeed.
The little black button is perhaps not a little girl colour but I like the pretty texture of it. It was also the size I was looking for. I made the loop on the left-hand side with embroidery thread in its full six strands. That came together very quickly which I really appreciated. The button is just sewed to the side of the vent so it sits nicely centred when closed.
I sewed the ruffle down with suitably pink yarn. That was not in the instructions but I thought it would make it hang nicely. Don't know if sewing this down is a good thing once this gets washed and needs to be pressed. I'll ask the little girl's mum to tell me so I'll know for next time.
I enjoyed making this a lot and think that it will make a great repeat pattern. I might use the binding on the armholes next time - I didn't have enough of the blue fabric so I went for a baby hem which unfortunately twists outwards a bit in the tightest under-arm area.
I will keep an eye out for a fun, bright and colourful 'kids' fabric for the next one. I can't remember if I heard mum say that her daughter doesn't like pink? Hopefully this shade is okay but that's something to keep in mind too.
I'm already wondering if I can use up some fat quarters and colour block it: use a fabric for the "bodice" part and at least one other fabric for the "skirt" part. And if a fat quarter isn't wide enough then maybe in pieced vertical stripes with a third fabric?
It would also be nice if I could draw sleeves for this. Short ones would be enough. I should be able to Frankenpattern this from somewhere else - the downside is that I wasn't exactly planning on starting a stash of kids patterns! Oh well, it might help me use up fabrics.
A great project and I can recommend the pattern! You don't have to do a zip so this would be suitable for slightly more advanced beginners than complete new-to-sewing starters. If you are looking for a small and first project: do a gathered skirt made from two rectangles like Simplicity 9938.
So you're faithfully following along the sewing instructions of your pattern and then it suddenly becomes incredibly difficult to get your project under the machine's needle so you can work on a really tight area? It's enough to give you grey hair!
Been there many times and I hate it. Some commercial sewing pattern instructions seem determined to make things as difficult as possible. Unfortunately these difficult to sew areas then make your garment look home-made rather than beautifully crafted.
Here's a principle that cuts down on some of those problem areas: If in doubt work on the flat piece first.
Plackets, zips, pockets - what's the point of closing the long easy-to-do seams first and then do the fiddly bits? I just don't get why some sewing instructions do this the difficult way around.
You don't need to stick to the order suggested.
Look at what features your garment has: double-ended darts, zip, plackets, pockets, pocket flaps, collar etc, etc? These are really nice sewing exercises (as long as you don't let the instruction sequence make your life more difficult).
Once you've cut out your pieces and overlocked what needs overlocking* - do all darts first before you sew anything else. No side seams, no nothing else. The sewing instructions usually start with this too, so no problem here. (The only exception I can think of is if a dart needs to meet another dart exactly: then it is much easier to close the seam first and sew the two darts as one across the seam. Anything to make life easier!)
*: But sew darts that end in a seam before you overlook the piece: less bulk when you take a single pass with your overlocker over the sewn up dart avoiding three layers of overlocking.
I used to hate having to do zips, now I like them more and more. Sew them in first!
Don't even close the seam underneath yet (a lot of YouTube videos show it this way too so you're in good company), sew the zip onto both pieces and once you're happy with it close the seam underneath (make sure to off-set this line by a millimeter or so to avoid the pucker at the bottom of the zip).
Same thing for plackets on sleeves: sew them in before you attach the sleeve or close its side seam (a very good placket article on Threads shows it that way too).
Patch pockets: why go to the trouble of working on an almost assembled item when it is so much easier to sew a pocket onto flat fabric. In-seam pocket bags are also easier to do before you close the longer seams: a) attach a single pocket piece to one outer piece and b) the other pocket layer to the other piece - then c) sew the pocket layers to each other, and d) close the seam of the outer garment above and below the pocket opening.
I would attach a collar as soon as the shoulder seam is closed, before any other seam stitching.
Depending on the shape of a sleeve it can be easier to sew the
sleevehead to the front and back of the garment before closing the side
seams of body and sleeve - this is easier for wider, more relaxed
styles. Sleeves that are quite tight and where the sleevehead needs to
be eased into the armhole are better done after closing side seams.
Flat pieces are easier to manoeuvre and allow better accuracy. They are also easier to press (best sewing tip ever: press, press, and press again!).
Once you have these kinds of elements done, the rest of the garment is much easier to assemble: nice long seams that pull everything together. After that you are left with things like neckline bindings and hems that need to be done across all closed seams. Couture houses work this way too: everything is done flat until only the long seams and hems are left over,
Are you thinking of Christmas gifts and outfits? With this in mind I thought I would show you some of the fabrics available at a shop near my home. It is the Sewing and Craft Superstore, 292-312 Balham High Rd, Wandsworth, London SW17 7AA, just 1 minute from Tooting Bec tube station. This is part of the downstairs area and you can't see the little side sections, what's behind me and the upstairs section with silks and satins. What follows is a quick browse first thing on Saturday before the shop filled with customers and some ideas, mainly stolen from other people, of simple items to sew..
Here are some of the things that caught my eye and wouldn't break the bank.
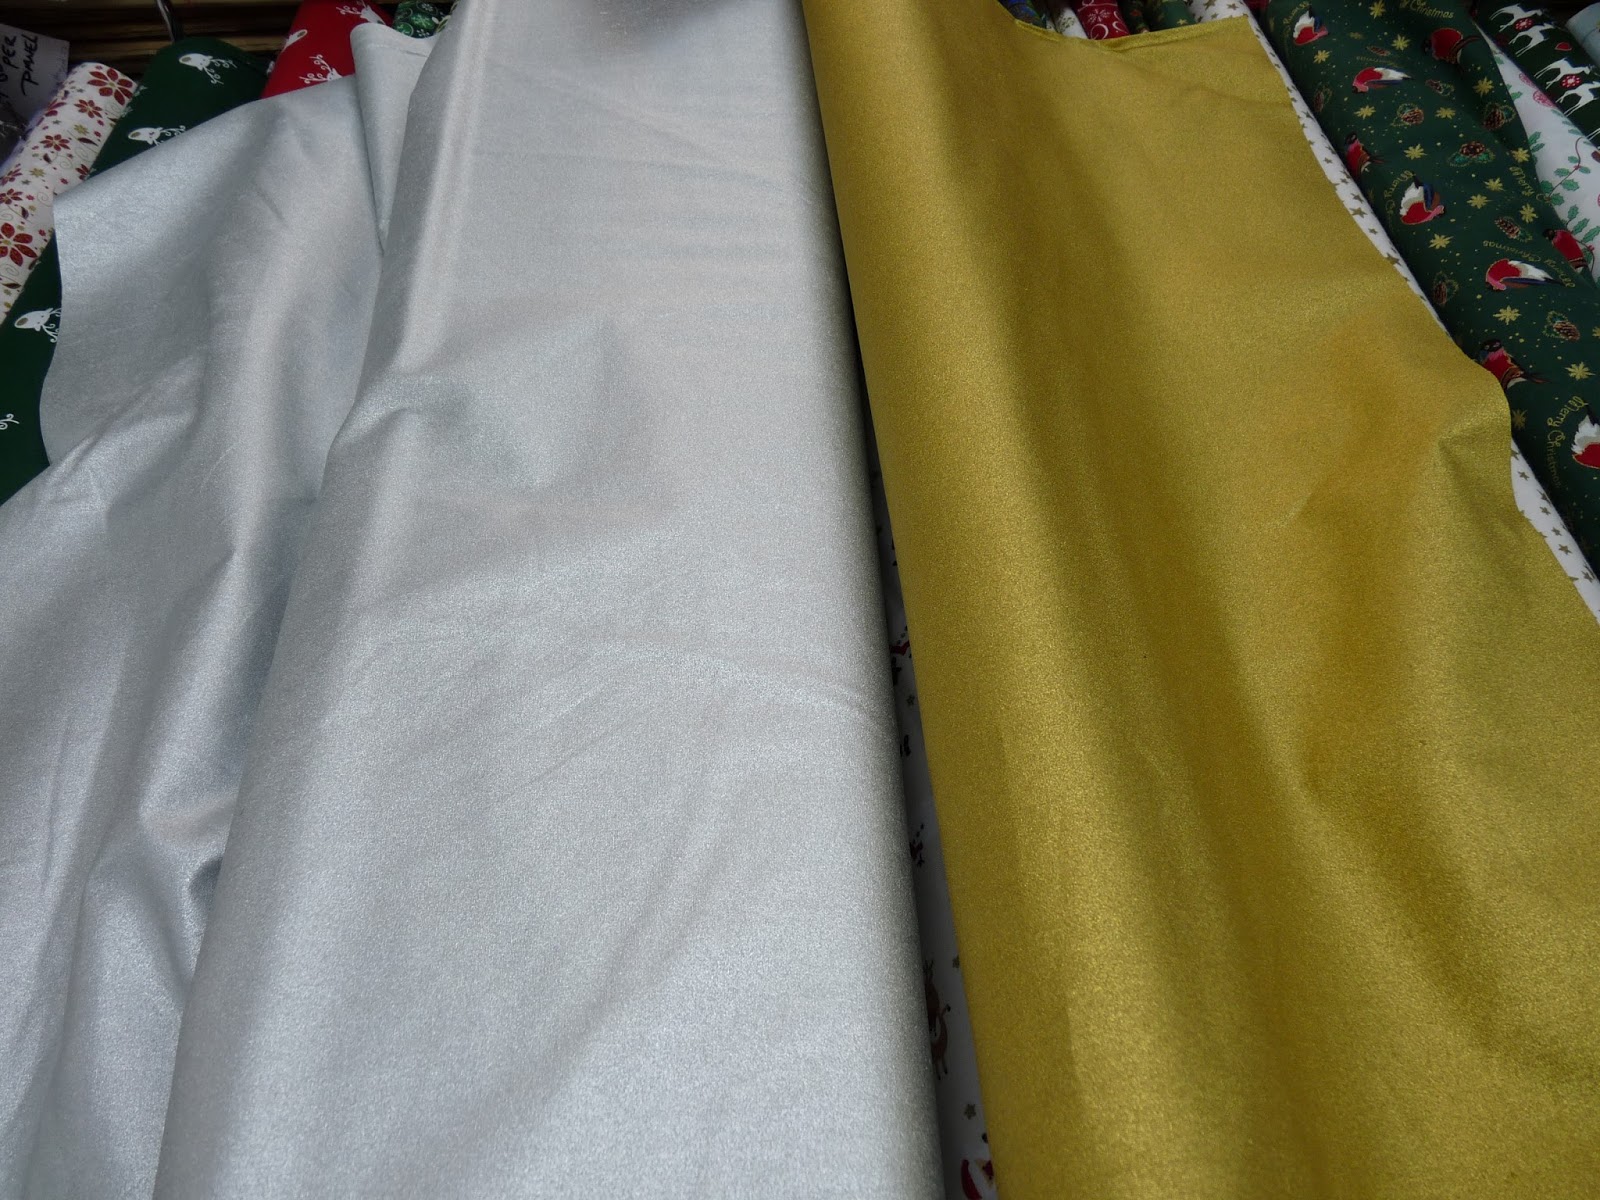
Items for the festive season don't have to shout CHRISTMAS. A bit of subtle glitter makes things appropriate beyond Yuletide. Here are two 100% cotton fabrics 140 cm wide at £6.99 a metre, one with a gold sheen and the other silvery, that would make nice skirts to be dressed up or down.
How about a simple top or bustier in these star spangled fabrics below? These come in white or grey with silver stars and red or green with gold stars at the same width and price per metre as the plain gold and silver above.
There is currently a Half price sale of patterns by McCalls (until 4 November) and Simplicity (until 28 November) at this store and in pattern shops elsewhere. So it might be the opportunity to buy This peplum top that I think would look striking made up in the sleeveless version using
one of these star fabrics. Another pattern that is tempting me is this knit top
with 3 different versions. One version, version C, takes only half a metre and all
versions are very quick to make. There is a video by Brittany J Jones
in which she demonstrates how to sew version C, plus how to match
stripes if you are using striped fabric
I would use the fabric below to make version A or B but that is purely because I am beyond the age to get away with a cropped top with Bardot neckline. The fabric has much more of a golden look in reality, it is a polyamide mixture stretch 145 cm wide and priced at £7.50 a metre.
As for a skirt to go with it my fancy would be for this laser cut scuba, 150 cm wide and £7.50 a metre. For modesty you could make a simple waist slip to wear underneath, just a tube of fabric cut to the width and length you want with the top folded over to form a tube through which to thread an appropriate length of narrow elastic.
You could use the same waist slip base to create a foundation for a fairy tale skirt of many layers from these gorgeous organzas or tulles.
And what about this floral corded lace, scalloped at both selvedges. It comes in white,pink, grey and gold , 130 cm wide at £9.99 a metre. I wish I had an excuse to use it, it would make a gorgeous overlay to any garment.
That's enough of selfish sewing and on to the many fabrics suitable for sewing easy to make Christmas gifts. These two cotton prints below are my personal favourites for an apron because I'd hope the dark colour and busy print would disguise any cooking splashes (well, that's the reason for wearing an apron and not just to look super cute and a cooking ace).
Sturdy tote bags are always a popular gift and there are a selection of heavier weight fabrics. Here are my two favourite winter themed ones that would still look good at any time of the year. These are 150 cm wide and cost £7.99 per metre.
For lighter weight bags, again going with something Christmassy but which would not look out or place at other times, here are two that I favour. They are 135 cm wide and cost £6.99 per metre.
There are plenty of tutorials and patterns on the Internet for making bags. Have a look at these 10 free patterns from the Craftsy blog. Of course, you may be making your bags from left over fabric you already have but if you need any haberdashery items such as clasps, ready-made handles then you can get them at this store.
I find it much more difficult to get ideas of things to make for men and boys but I have had success with drawstring knapsacks Here is a tutorial to make a drawstring knapsack. I made mine using a lining made from shower curtain material as the recipient wanted a bag that was waterproof on the inside for carrying damp towels and swimming clothes from the gym. This shop also has a selection of cords and tapes suitable for creating the drawstrings.
Last Christmas I made a number of the zippered pouches shown above. This one was intended for a female and the ones for males had rather boring stripes; I wish I had found some fabrics like those below that I could have used to reflect their interests.
There are lots of tutorials to make this type of pouch, there is one on Jessalli Handmade's channel that is very quick to make. I added a cord pull to my zip to aid zipping and unzipping and a top-stitched tab at one end, that you can just about see in the picture, to enable it to be hung up if wished.
And talking about relating fabrics to the recipient's interests, how about gifts for us sewists. There are plenty of sewing themed materials in the store and these two below are my favourite. These are 100% cotton, 112 cm wide and £5.99 a metre.
As for ideas as to what to make for Sewists, The Sewing Directory site has a special Sewing Accessory Projects section in their fabulous Free Projects. This is full of gift making ideas and well worth browsing.
I am going to make this my last suggestion, though there is so much more I could add. There are some faux furs, both of the fun and the realistic sort. The most expensive (that's the realistic ones) are £16.99 a metre and would make a sumptuous scarf or stole, just sew a lining to the back of the "fur"and "Voila!", the look of luxury at a pittance.
Have you a fabric store near you that you would like to recommend? Would you like to share any suggestions for Christmas gifts we could sew? Please let us know in the comments below or comment on the Club meetup site on the Christmas Gift Sewing event I have just put on.
Every so often a pattern comes along that is easy to make, easy to wear, fills a hole in your wardrobe and looks great. The Zoe dress by Cotton + Chalk is one of these and, what is more, it came free with the current issue (no. 35) of Simply Sewing magazine. It comes in a wide size range, bust 80 to 114 cm. (Psst, there is also another lovely free pattern with this issue, but more of this later).
Unfortunately my tame photographer is away at the moment so I have had to take a snap of it on a dummy, which is a shame because you do not get an action shot and this dress has excellent twirling possibilities. I will use my powers of persuasion, i.e. no photo, no clean laundry, to get him on his return to take a shot that I will post in the Club Member's Makes photo album.
This is the front view. I think you can just make out where the in seam pockets are- yes, pocket lovers, somewhere to stuff packet of tissues, bits of string, cough sweets...
And here is the back.
This dress has amazing potential. It can be worn as a dress but also you can put a t-shirt or jumper underneath it. Just think of its usefulness as a holiday item, particularly as it also looks good worn with a belt. Pack a belt or two, a striking necklace and you can go from day to night and go from hot weather to cool by layering.
I admit mine is in boring grey but I'm a boring grey sort of person but, come summer, you might find me making another version in a bright print.
Still not convinced to make it- then I must tell you that this dress requires no fastenings whatsoever, no inserting zips, no making of buttonholes, Whoop, Whoop! All you need is the fabric and some fusible interfacing- and thread, of course.
I was going to the Knitting and Stitching Show at Alexandra Palace a few days after I bought the magazine and was on the lookout for some suitable material. The bolt I picked up was labelled 100% cotton and was just the colour and weight I was looking for. I thought it strange that the stallholder immediately offered to give me a reduced price and that the width looked a bit more than marked on the bolt label but only rarely do I quibble if someone is offering me a bargain. My fellow club members at the Show also had their doubts about the nature of the fabric when I showed them my purchase so I did a burn test once I got home and found it to be polyester. This wasn't a problem but the seams did not press down as well as they would have with cotton.
I did not need to make any changes to the pattern, apart from the length. The pattern offers 2 lengths, finished back length 46 cm (too short for me) or 76 cm(too long). I reckoned that about 65 cm would be about right so I purchased only 4 metres instead of 4.5 for the long length. As so often happens with other patterns, by using a different pattern layout (but being careful to place the grain lines as indicated) I used less than indicated - only 2 metres, leaving me with a whole 2 metres for another project.
The pattern instructions are straightforward. However I didn't like the method of inserting the back shoulder straps into the front shoulder opening. Despite sewing and unpicking several times I could not get a neat enough seam and, as I don't think people stare at your shoulder seams much, I gave up with a "Good enough" result. I have subsequently thought of another way of doing this, by leaving gaps in the back facing to insert the straps, and will try this out if I make another one. The only change I made in making up was to top-stitch around the neckline and back, this was mainly due to the difficulty in pressing the fabric flat but I like the look it gives so I am glad that I did it.
So here is the pattern and magazine to look out for, it is in the shops now.
And you may notice on the cover of the magazine a small photograph of the other pattern that comes with this edition The Jade Dress by Simple Sew. This is a jersey dress just right for autumn/winter and that is soon going to be on my cutting table (alright, the dining room table). I saw a lovely version on display on the magazine publisher's stand at the Knitting and Stitching Show whereI bought the fabric for my version of The Jade Dress - but my fabric for this is certainly not boring grey.
3 days later. He's back so here are some action shots.
Getting ready to twirl-
No you’ve not accidentally stumbled upon a
foodie blogpost, I love my food but I'm not talking about that kind today, haha…. Ham
means a whole different kind of thing to anyone who does any kind of
dressmaking, as the tailor's ham and sleeve roll are important pieces of kit in the sewing arsenal, aka, the ham and sausage/sleeve roll.Here are mine…
They are essential for pressing out seams properly. The tailor's ham is used on curves such as darts, sleeve heads and princess seams; to get to
the seams inside sleeves, the sleeve roll. They're available to buy ready made, but me
being me, I had to make my own. If you'd like to do the same here's what I did.
They’re a basic egg (or ham!) shape so you
can draft your own but I decided to use this one by Doja
They are traditionally made with two types
of fabric, one side is wool and one side is cotton for the ironing at different
temperatures and fabric types, then they are STUFFFFFFED with sawdust until
they are as firm as you can possibly make it. Some tutorials out there use
fabric scraps but the sawdust is the traditional version as it helps with the
firmness and the moisture from the steam but your choice.
I used a wool tweed and some scrap curtain
lining from my stash but choose whatever you want. Do avoid synthetic fabrics and
mixes so that you can iron at high temperatures as necessary.
I cut out an additional layer for the
inside as a precaution of any sawdust leaking out, so for mine I cut 3 in
cotton and one in wool. I sewed it up in two separate layers then put one
inside the other, but if I did it again, I would sew all four layers in one go; I added a hanging loop too.
I used wood shavings intended for
pet bedding, I bought mine from Wilko, 50p for a small packet and used the
whole lot. Some people use sawdust from
DIY or timber merchants, but personally I wouldn’t because I think they cut MDF
and the dust would be all mixed up. MDF dust is not safe due to the fine
particles and the toxic factor from the glue. (MDF is basically wood particles
glued, compressed and re-cut, think of it as the wood equivalent of burger
chain fries)
It’s a MESSY job and was more tedious than I had thought it would be so be patient. You stuff it bit by bit and then squish it
down as you go, bashing the sides to compress it sideways.
I did this in the garden, in a wide plastic
container to reduce mess and rolled up a funnel out of card which I inserted
into the ham and poured the shavings into the funnel from the packet. This proved to
be the least messy way compared to spooning it into the funnel or directly into
the ham/sausage. Sorry for lack of pictures but I got engrossed into the
stuffing and thought it not a pretty process. Stick the funnel together and not
do as I do, I had to roll it up after each time I put it down…
This is where I would advise against sewing
the two layers separately as I got sawdust in between the layers and got little
lumpy bits, which were a pain to get out, otherwise I would not have the
nice smooth surface I needed for ironing… sigh, live and learn! The funnel helps direct the sawdust aswell, I think using the spoon got it between the layers.
Stuff. Bash. Stuff. Bash. Keep compressing
the stuffing down, in hindsight I should have done more side bashing aswell as the poking down
on the ham as it's not quite as firm as the sausage. Once stuffed all the way, I stitched the opening by hand and
stuffing more into it as I closed it up. The thing compresses more as you use it so the
harder and fuller you can make it, the better.
If you decide to have a go, here's a summary of my tips.
Use pet-bedding for stuffing
Use four layers and sew them
all in one go to avoid getting the stuffing in between the outer and inner
shell. The additional layer also gives a slightly smoother surface I think.
Use a funnel to help with the
filling. Roll some paper or card into a funnel shape and stick it together
Compress the stuffing as much
as you can. Bash the thing against the table or use a wooden spatula (or any
other kitchen implement!) as you go.
Stuff up until the last stitch,
there is always room for a wood shaving more
The whole make took a few hours from beginning to end but I like mine as they’re a bit bigger than ones you can buy. I think you may not need to add seam allowance to the sleeve roll, it might be a bit big if you decide to make any slim sleeves for knits or perhaps children's clothes.
I hope you find this post useful if you decide to make your own. If you don’t, well, you’re probably putting your time to better use making a
beautiful garment instead of stuffing and bashing these odd looking things…
I’m Juls and this is my first ever blog
post on Blogland… Thank you to Giselle for trusting me to put my
spiel out there.
Today I’d like to share with you my first dress
and other sewing skill firsts.
I was invited to a wedding and my friend had decided
on a white theme with all the guests to be in white (or shades of).
Sounds unusual but on the day it looked so beautiful, quite ethereal, the amazing sea
views and beach club were a perfect match with all the white. Even the groom and all the male guests were in
white. It was gorgeous! Since the groom was Indian, many of the family and friends wore white saris and with all the intricate embroidery, such
fabulous outfits were in abundance!
I usually have difficulty wearing dresses,
the waistline never sits in the right place for my body shape and so I was
dreading shopping; plus the fact that my friend preferred me to be in a full
length gown, this compounded my woes. I didn’t hold out much hope in finding a
white dress that didn’t look bridal.
I am very new to the world of sewing/dressmaking and
at this point of deciding to make my own dress, my sewing endeavours to date are a
blind, a pair of pj shorts and the infamous Sorbetto top.I don't know what possessed me to think
that I could sew a wearable first dress ..... and all for a special occasion, just a bit mad ambitious!
I have previously shied away from dressmaking on the basis that my sewing ability would be well below the standard of what I want to wear. I’ve tinkered with a craft project or two and only decided to buy a sewing machine to attempt to sew some blinds (still incomplete).
My original planned dress pattern was chosen 4 months before the wedding (Butterick 4343) but I constantly put off starting it. The pattern said it was fast and simple, but the prospect of fitting and sewing princess seams in 6 panels in total, plus lining, made that 12 seams into a tight fitting dress, plus an invisible zip GULP! I was intimidated.
Then late on
a Sunday night, just 10 days before the wedding, (ok yes I procrastinate) I changed
tack and fished out New Look 6119 pattern from my extensive pattern hoard.
I bought fabric on the Monday after work
and by the weekend I had made the muslin. Never having sewn a
commercial pattern, I wasn't sure how my size compared to their sizings so I
chose one based on the finished garment size. This pattern has 5 inches of
ease! FIVE!!!! I did chose correctly for the bust, but also took the waist in a tad more.
Just to add to my “first dress challenge”
(eye roll), I made some changes not in the pattern, I added a lining and also a
central split up the centre front, just for a bit of added va va voom. I
ditched the neckband and sash belt in favour of sewing a chiffon scarf and
sash. I was going for the floaty dreamy look, (which is probably where my head
was when I decided to do this dress….) So I attempted roll-hemming two lengths
of two metre chiffon for the first time (at 3am in the morning – crazy chick!) But.... it all went fine! No tears or chewed up chiffon swallowed by the machine...
My version was in a light crepe with a bemberg lining, chiffon neck band and belt sash. I took a big risk with no back up outfit, I had no idea if it would suit me, or if all the modifications would work etc. Literally blood went into this (stabbed myself with the needle securing the gathering at the neckline whilst wearing but thankfully it marked on the inside, phew) It was do or die (of outfit embarrassment)
I also pondered over ways to do the channel
for the neck band and attachment for the lining for a while and just decided on
doing it between the lining and outer fabric. The original pattern used wide
bias tape and narrow tape around the armholes both of which were no longer
appropriate because of the lining.
My deadline was running out fast and I
sewed into the night until 4am because I had to fly out the next morning and
had yet to pack… (Panic!) I flew out with the garment needing a lot finishing to
do.I had also bought some very pretty diamante
trim from MacCulloch and Wallis as it was a simple dress I thought it would enhance
it.
Whilst I was away I hand sewed the hem and
split (on the flight), and the diamante detail on the neckline finishing on the morning of the
wedding!
I was pretty pleased with the final result, much better than I thought it would be. I like the pattern and my dress, more so than I
anticipated when I bought the pattern, it’s actually really versatile and can
be reinterpreted in so many different fabrics. I would make it again if I need another special occasion dress. I can imagine this in an evening dress fabric.
I learned a ton doing this dress pretty
much everything was new to me and now I think I may really be able to take on sewing and dressmaking.
It was Martina of LaDulsatina who finally inspired me to take on dressmaking, by my standards she bravely took on projects with great success when she first started and she has now progressed into drafting her own gorgeous garments.
For now, on this dress the seams need tidying, learning the overlocker can wait and I didn’t like the suggested seam finishes (my fabric is quite see-through). The hemstitching kept snagging on crystals on my shoes even though I tried to keep them in the fold, but they were not as small I would do normally as they seemed to show on the front despite only catching a couple of threads so I will have to redo this.
Thank you for reading my first ramblings…sorry
if I bored you with the background of it all.
Now, I need to sew more and read less about it... a little more action and a lot less procrastination!