Subtitle

. . . . . . A place to contribute, exchange tips and ideas and find further info on the LDC group on Meetup.

Wednesday, 16 December 2020

Trying out a Free Pattern- Knee Length Tulip Skirt with Feature Pockets

 This is another pattern from Sew Magazine available as a pdf.  It is described on their website as a "Simple Knee Length Skirt" and also, on the pdf pattern piece layout( see picture below), as the Barkside Skirt but I think the title of this blog gives a more accurate description. This is the link


 Printing and assembling the pattern  For review I am trying to choose easily available patterns without a hugh number of pages to print out, this one takes 12 pages of A4 for the pattern itself.  The link will take you to a page with the making up instructions.  When you click the download button you will get access to more than one pattern and, for this skirt, you need to scroll to Pages 25 to 37.  Page 25 shows the way that the pdf needs to be assembled.  Pages 26 to 37 are the pages you will need to print for the pattern.

Usually, with pdf patterns, there is a square of 10 centimetres at the beginning of the printout with which to check the accuracy of the printing.  There is none here, though you are advised to set your printer to print to "Actual Size".  My printer does not print right to the edges and it appeared to me that the pattern pages needed to be placed edge to edge.  There is no indication on the pattern which size is which or which pocket position marking relates to which size; you have to work this out for yourself but it is not a taxing task.

Sizes and Alterations  There are only three sizes, these are waist sizes- 68, 72 & 76 centimetres.  However it would be easy to grade the skirt up or down a couple of sizes.  I decreased the size of the waistband by 4 centimetres but left the body of the skirt as is since the skirt is gathered into the waistband and I thought that leaving the skirt pieces as they were would accentuate the tulip shape.  The pocket and flaps are the same for all sizes so do not require alteration.  I added 12.5 centimetres to the length of the skirt so that it fell just below my knee.  To do this I drew a line across the front and back pieces 5 centimetres above the hemline, cut across, inserted the requisite addition and redrew the side seams from below the pocket position to the hemline (see image below of the back piece).

Making up  The process is not difficult.  The pockets are sewn up first.  They are lined, each pocket consists of a pocket bag and a pocket flap and the corresponding linings.


 The flap is made up by laying the flap pieces right sides together and sewing a 5 mm seam around 3 sides leaving the long straight side open.  The flap is then turned right side out and pressed.  The open side of the flap is placed between the marked notches on the straight side of the pocket bag and the pocket lining placed over the flap.

The straight side with the pocket flap and the curved side are then stitched and the pocket turned through one of the two openings so it looks like this:-
 

The pockets are then placed, matching them to the markings at the waist edge, on the front of the skirt.  The concealed zip is  inserted and the front and back skirt pieces joined together.

I was puzzled by the method of adding the waistband to the top of the skirt, which is gathered to fit, so I followed my own method.  I had decided that I would do some quilting on the waistband, backing it with wadding between the main fabric and the lining.  It is quite wide and I thought that the wadding would make it stand up firmly.  It should be cut on the straight grain but I cut on the cross grain to contrast with the vertical design on the skirt.  I ironed the fusible interfacing on to the reverse of the  main fabric (not the lining as instructed), laid on the wadding, placed the lining and waistband fabric right sides together and stitched the top edges together.  I attached the front of the waistband to the skirt, folded the lining on to the wrong side and hand stitched the folded waistband over the attaching stitching.  Then I stitched over some of the black lines of the print in black thread, so subtle that you may not notice it in the photographs of the exterior of the skirt so I am showing a photograph of the inside.

This is how the back of the waistband looks when closed. I think that the quilting does enhance the waistband but remember that the addition of wadding will reduce the inner circumference of the waistband.


The back of the skirt has a simply constructed back pleat for ease of walking, necessary because the skirt narrows from the top to the hem.  This shaping means that it is not possible to exactly pattern match  but, as the fabric has a definite horizontal and vertical  pattern, I did my best to do matching where possible, see photographs of side seam and pocket.


 The pattern instructions suggest the sewing of a decorative button to each pocket.  I tried several examples from my button box, both plain and fancy, but none of them looked appropriate and I thought a button would detract from the drama of the fabric print so I left the pocket flap without one.
 
Verdict  I would have liked the sizes to have been indicated on the actual pdf  and a check square to indicate that the print out was the correct size.  The length of fabric is given as 1.1 metre for all sizes using the original length of skirt (63.5 centimetres) but the width of the fabric is not indicated.  If you decide to make it I would suggest working out the amount of fabric that you need by measuring the pdf to find out how much fabric and what width you require in your size.  The construction is not difficult and a beginner, who is happy with invisible zip insertion, could make it with little trouble.
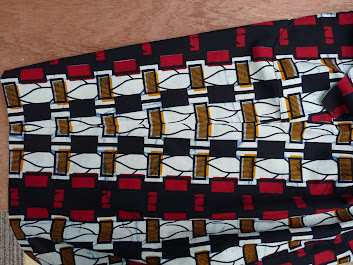
 I liked the shape of the skirt and the design of the pockets, indeed I will probably use this pocket on some other skirt or dress design.  I feel that the design on this African fabric from my stash admirably suits this skirt pattern.  It can be dressed up or look more casual and can be worn Winter or Summer depending upon the other garments worn.  I found the instructions difficult to work out regarding the waistband but I was ignoring these in any case to do my own variation.

The skirt for winter wear with thick tights and a wool polo neck jumper.
 
 For Summer wear, a somewhat more formal outfit.  The top is another free pattern, the Collette Sorbetto, with a hack on the original short sleeves to turn them into long bell-shaped sleeves.


This side view gives you an idea of the shaping at the waist.


Friday, 20 November 2020

How to sew curved hems!

I thought I knew how best to sew a curved hem but hey, there are more ways than I realised. The aim is to fold up the longer raw edge (i.e. longer than the stitching line) and sew the hem without getting puckers, wrinkles or pleats.

I found this YouTube video by Prof PIncushion (Link here) showing three different methods.


I very much recommend the suggested machine-basted stitching line (that's the one with the really long stitch length) because it makes pressing over the seam allowance a lot easier. You will get a more even distance from the fabric edge to the fold line that will look a lot better than eye-balling while pressing. It is such a pain when you have to repeat ironing after a first attempt looks frustratingly wobbly. Folding the fabric over at the basted line is easier because of the perforations in the fabric: it's almost as if the fabric wants to fold along that line. Highly recommended.

When you work with a thickish wool fabric then a high iron temperature and plenty of steam will shrink the fabric a bit so you can get the raw edge to reduce to the smaller measurement. That's what I did: baste, fold over and press and then press and shrink. But you can't do that with all fabric fibres. You need a different method for other fabrics.

I would be inclined to go with the first method Professor Pincushion shows but baste two lines: one as she describes, and a second one for where I want to fold the fabric over. This saves on the time it takes to measure and mark the fabric as per her demonstration. The bit I learnt from this video is her tip to pull at the higher up basting stitch line in those places where your fabric won't lie flat enough - to ease it in. That's really useful!

The rolled hem also sounds useful but to be honest I wouldn't have the patience for trimming the seam allowance as shown. Instead I prefer baby hems, particularly with light-weight fabric. This works best if you can overlock (serge) the raw edge. I machine baste at a folding line at a distance of about a centimeter away from the edge, and then overlock the raw edge. Then I press the fabric over once. I then edge-stitch the hem two centimeter from the folded edge. This leaves a very narrow seam allowance and keeps the hem nice and drapey. This can be lovely for the hems of flutter sleeves. A edge that's been folded over twice could be too stiff.

I also like the third method of sewing a ribbon to the hem, either on the right side as a decorative feature or on the inside. Either would give a skirt hem a nice bit of weight. A variation of this method is to sew on a ribbon onto the outside to diguise your top stitching. Ribbon or braid can be placed at the edge or even a bit higher up for a very attractive feature. You may want to use the same ribbon or braid elsewhere in the garment to tie it all together.

~ ~ ~


And here is another YouTube video by JOANN Fabric and Craft Stores (Link here).


I really like the look of the rolled hem. This method will probably strike you as needing too many basting lines that you need to pull out at the end - but just look at the neat result!  I think this makes it well worth it.

The bias facing method is also really impressive. It takes a bit of trial and error to figure out how much to pull at the bias strip to get it to the right tension. I would be tempted to pull a lot less than the word 'pull' suggests - just lay down the strip and smooth it to lie flat along the middle of the strip length (where you'll sew) as opposed to at the very edge. It is a touch annoying that you have to trim this down, but the sewn edge makes for a useful guide. I'm all for top stitching this instead of hand-sewing a blind hem. On the other hand, a thicker wool type fabric is quite forgiving and easier to hand sew, giving a really beautiful result.

The bias binding method takes more preparation for pressing the bias tape as described. The technique that I found handy involves a darning needle stuck into your sewing board cover at both its ends, as a "gate" to pull the flat tape through and press. This preparation will make sewing the strip onto the hem a lot easier. The suggested stitch-in-the-ditch method takes quite a bit of practise (you can also see how slowly she stitches). I must say that I am not hugely fond of the look you achieve with this method, I prefer a ribbon over binding or the above bias facing that will put the bias strip onto the inner side, making it invisible. I find that this looks a lot more grown-up, the binding method reminds me of kids clothes, but that's just me.


So there you have it!  Six different methods (seven if you count my baby hem method that I snuck in there), something to try out when you're not happy with another method. You'll find that the fibre and the weight of your fabric will make some of these methods more useful than another. Go and experiment!


If you are very new to sewing and find all these rather overwhelming then I recommend the first method Prof Pincushion describes (just with two basting lines). Or baby hems when you have an overlocker stitch available and need a really drapey hem for a thin fabric.


Thursday, 12 November 2020

Trying out a free pattern- A Review of The Alicia Cardigan.

 My Goodness!  No post since the end of May.  Time to remedy that.  I intend to write some posts about items made from FREE patterns so here is the first.

It's the Alicia Cardigan, described as an easy cotton jersey cardigan,  from Sew Magazine Click here for link. There are many free patterns on the Sew magazine website, not just for garments but for all sorts of sewn items, that you can download.  You do need to register before you can download a pattern but it is a simple process. 

The cardigan has an open front with no fastenings and you require no interfacing so it is ideal for sewing when non-essential shops are closed and all you have to hand is fabric and thread. The size range goes from UK size 8 to size 20.  The fabric amount required is given as 1.3 metres of 150 cm wide with no indication of any variation of the amount between the sizes.

I wanted to use up fabric left over from previous makes and orginally thought I could make the garment  by pairing two jersey fabrics of the same weight and doing some colour blocking.  However I did not have enough fabric to do that and tried it out in a thin polyester knit that I had bought for a pittance in Fabricland's Brighton branch closing down sale.  I intended to use it for wearable toiles and had already made a long-sleeve t-Shirt from it.  I still did not have enough to cut out the pieces as indicated and had to piece the neckband and the sleeves.


The pattern has 4 pieces contained on a PDF of 20 pages of  A4.  I always trace my patterns, even PDFs.  A tip that I received recently was not to stick all the pages together before tracing but to put together only the pages for one piece at a time and to trace just that piece before going on to the next piece.  I had not thought of this before.  It was very useful advice as any misalignment of a page can lead to a distortion of the following pattern pieces by the time they are all stuck together.

The cutting instructions (how many to cut, when to place on fold etc) are clear on each pattern piece.  The seam allowance is included and is 1 cm throughout.  The instructions are concise (consisting of 4 brief paragraphs) as there are no darts, gathers or pleats with which to contend.  One thing that perturbed me was that the armhole was the same at the front and the back and thus the sleeve head was  same on both sides also. A well drafted pattern would have a difference as you require more fabric across the back. In a woven pattern this would make a difference but, as this is a knit garment with an open front, it seemed to work well enough when I tried it on.   Sleeves are set in on the flat and I had no problem easing the sleevehead to fit the armhole.  Where I had to piece the sleeves for wrist length I stitched either side of the seam across the sleeve and hoped it looked like a design feature.

In order to reinforce the idea of deliberate design I also stitched either side of the shoulder seams.  I am still debating whether to stitch around the neckband also but will wear it a few times before deciding.


Paragraph 3 told me to turn up the hem in such a way that it created the appearance of a band being added to the bottom of the cardigan.  I did not like this and did a normal hem, which I stitched down with lightning stitch ( also known as stretch stitch)  This gives a bolder look (a bit like topstitching) than an ordinary straight stitch without the need to change to topstitching thread and I preferred it in this case to zigzag or twin needling.


The final paragraph, number 4, dealt with the neckband.  This is where I came a cropper!  The neckband consists of 2 pieces, just long rectangles, that are joined at the centre back at the short sides.  Because, once more, I did not have pieces long enough left amongst the remaining scraps I had to cut the neckband in 4 pieces making sure I added a seam allowance for sewing the pieces together.  I should have ended up with four pieces of the same size- but I didn't and I didn't realise this until I had sewn the neck band pieces together.   I do not know how I managed this as I thought I had been so careful with regard to the cutting of the pieces.  I was worried about carrying out the instructions for attaching the neckband, which involved folding the band so the right sides are together and stitching the short ends of the neckband across. With the neckband turned to the right side it is stitched to the cardigan front.  However this means that the neckband must be precisely the correct length.  After my cutting faux pas I could not guarantee that it would be.  I thus tackled the neckband by not sewing the ends together but attaching one side to the front with a 1 cm seam allowance, folding the neckband over to the wrong side, turning under 1 cm and invisibly hand stitching it down.  This meant that the neckband seam was completely enclosed and not exposed on the inner side as it would be if the method given in the instructions were to be followed. The neckband lies very nicely around the back of the neck.

I did think of adding pockets, this is not included in the pattern but I cut out a test patch pocket and lined it to avoid stretch but I did not like the look of it on the thin fabric.


So what is my final verdict?  I cut the size 10 and did not alter the fit in any way.  It is a perfect fit.  I am pleased with it and it will be a very useful addition to my wardrobe.  For a change it looks better on me than it does on the mannequin.   It only takes a small amount of fabric and is quick to make. It is made from cheap polyester so I do not expect it to wear well.  Once lockdown is over I shall be out looking for some thicker jersey to make another one ( colour undecided) - unless I discover something suitable hidden in my stash beforehand.

If you are looking for an open front cardigan then you may also be interested in another free pattern in the same sort of style, The Harper Cardigan and Duster by Sinclair Patterns

This comes in 3 different height sizes (Petite, regular and tall) and 3 lengths and includes pockets amd 3 different sleeve lengths.  There is a sewing demonstration on Youtube from Beyond The Pink Door (click for link)

Keep sewing and stay safe, for your sake and for the sake of others.

Wednesday, 27 May 2020

Shut In Sunday Scribblings ending 24 May


More information garnered by our members during the past week.
Members have suggested interesting sewists to follow-
Emily Hallman - on Instagram @emilyhallmandesigns and her blog : this week's post on her blog is called 'Why I Sew in Collections' http://emilyhallman.com/2020/05/20/why-i-sew-in-collections/
Martha Moore Porter- on Instagram @burieddiamond

The Stitch Sisters have produced a youtube video on draft it yourself dungarees. https://www.thestitchsisters.co.uk/diy-dungaree-overalls/?mc_cid=0423e83af9&mc_eid=9f0155556a

If you are interested in bra-making or thinking about it here are 3 videos by Liz Sews that may help https://www.youtube.com/watch?v=x9MuxfFaiDc
https://www.youtube.com/watch?v=3TwOrw1bJRo
https://www.youtube.com/watch?v=0UnCCRwE6d8

 The Fashion Box in East London have launched a service for making pattern blocks to your specific measurements so, If you have been struggling to get a bodice/ trouser/ jacket block to fit you, this might be what you need.
https://www.thefashionbox.co.uk/blocks

 One member cracked the blind hem by machine with the help of a you tube video - clear explanation. She has other videos
https://www.youtube.com/user/madetosew

Happy sewing to you all.

Sunday, 17 May 2020

Shut In Sunday Scribblings ending 17 May 2020


 Another week in lockdown and more information from members with ideas to keep us occupied

Free pattern for limited time only. From "Michelle Sews" comes what looks like a beautifully drafted pencil skirt, fully lined with kick pleat, zip guard and pockets and very clear instructions. https://michellesews.com/agnes-skirt/

Are you in love with vintage patterns then this one is free now https://www.mrsdepew.com/blouse-and-dress-patterns/1930s/1930s-neglige-robe-or-dress.html

Another free pattern from Mrsdepew.com enables you to add a vintage touch to a dress or top with these collar and cuffs   https://www.mrsdepew.com/accessories/1940s-collar-cuffs--jabot.html

Another free pattern, a button front skirt with pockets, from Ready to Sew. https://readytosew.fr/en/shop/9-justine-skirt-free-pattern.html

Useful post on the Tilly and the Buttons blog on how to do a full bust adjustment on a dartless bodice. https://www.tillyandthebuttons.com/2020/05/full-bust-adjustment-fitting-dartless-bodice.html

Youtube instructions on how to draft your own jumpsuit from Rosery Apparel 

More from Rosery Apparel just uploaded on youtube- free pattern for bucket hat. Anyone intending to go trekking in the African bush or even strolling along the promenade at Brighton, you definitely need this hat.https://www.youtube.com/watch?v=-vDXTc_PYmI&list=UUbPC0wmKa51g4JdIRC9Td2Q&index=2&t=0s

 Thank you to everyone for their contribution and chat.  We will also be chatting online with a Zoom meetup next Sunday so come and join in.

Monday, 11 May 2020

Shut In Sunday Scribblings ending 10 May 2020


A number of topics came up in this week’s Shut in Sunday Scribblings so here is the information from the members that took part- thank you to all of you.

Swimsuit patterns and Swimwear Fabric
The following are all available as PDF downloads and the first 3 are free patterns to download
Suggested Fabric Suppliers for Swimwearsuggested by members - Sew me sunshine https://sewmesunshine.co.uk/ have some swim fabrics.  Funki fabric having a good selection  https://www.funkifabrics.com/
Fabric and alternative patterns are available from  the following site  
Vintage Style
Free (lockdown offer) digital vintage 1930s button front skirt pattern 32 inch waist from Mrs Depew
http://www.mrsdepew.com/blouse-and-dress-patterns/1930s/1930s-slim-skirt-3057-1933.html
Check out more of this site for lots of other vintage goodies and freebies http://www.mrsdepew.com/freebies.html
Another vintage site where patterns and other information vintage, such as films of fashion shows  etc.,  is available is https://www.thevintagepatternshop.com/  However one member commented on the patterns as follows “There are some fabulous patterns to drool over. But I've bought a couple and I haven't been at all impressed by the quality for the price, as they are somewhat 'hand drawn' tracings. Not to put people off entirely, but forewarned is forearmed.”

Blog posts with useful information.
Brilliant blog post from Sew Sarah Smith on complex pattern matching. https://sewsarahsmith.com/2020/05/06/how-to-pattern-match-complex-prints-sewing-tip/#more-21866

Embellishing your garments
One member had a go at machine smocking as seen on The Great British Sewing Bee, episode 3 and posted photographs on the Meetup site.  It looked very effective and is a quick means of achieving an effect that , done by hand stitching, takes some time to do.
Another method of embellishment, which seems to be more popular in the USA, is a method developed by Natalie Chanin.  Definitely one for those into slow sewing. Check it out -https://journal.alabamachanin.com/tag/stencils-patterns/https://journal.alabamachanin.com/tag/stencils-patterns/
Here is Natalie on The Moth talking about handsewing practice, making peace with Alabama and making ‘New York City Fashion’ by hand.
https://www.youtube.com/watch?v=ka-ok3vD-j8&list=PLwqPCA5hHQBb4xcSAmic5yWxcwrASWfHq

Documenting your making
I was given a Sew Crafty Sewing Journal https://www.liveitloveitmakeit.com/2015/08/sew-crafty-sewing-journal.html but I am coming to the end of it now and would like to continue recording my making. I wondered what other methods there are so I asked members if they kept any record and how.
6 people responded, 2 of these did not keep a record of their makes, 1 used Trello to record their patterns and made notes on this or on the PDF download, 2 used Instagram but, in addition, one also took photographs and used her blog and the other also kept an A5 notebook  dedicated to dressmaking with all kinds of ideas, sketches, inspirational pictures, technique notes etc. to enable her to look back upon her thoughts. 1 member uses an A4 clothes design sketch pad with figure outlines and recording size used, pattern alterations, notes for amendments in the future.  The sheet is then hole punched and stored in a ring binder. https://www.amazon.co.uk/Fashion-Sketchpad-Templates-Designing-Portfolio/dp/0811877884/ref=mp_s_a_1_4?dchild=1&keywords=clothes+design+sketchbook&qid=1589191217&sprefix=clothes+design+ske&sr=8-4
I have been thinking of creating my own Sewing Journal along the lines of this one made and described by With My Hands Dream( and with free downlodable sheet to print out).  https://withmyhandsdream.com/2017/07/17/make-your-own-sewists-notebook-free-printable-templates/
I have created my own croquis, using a photograph taken in my underwear of my front and my back, so perhaps I will use this together with some of the ideas gleaned from the above contributions to make a Journal that has all the features that I want.  

Join us for this week's Shut In Sunday Scribblings on the Meetup site, you can add your comments at anytime and do not have to wait until Sunday   https://www.meetup.com/dressmakers/events/270580916/

Sunday, 3 May 2020

Shut In Sunday Scribblings ending 3 May 2020


We are carrying on sewing most definitely. Alix and Clare have been sewing PPE and still had time to do some sewing of their own.  Maureen is practising sustainable sewing and will be using a GIANT charity shop t-shirt to cut up for fabric- look forward to seeing what you make.  Clare is about to tackle a UFO.

Here's some information that came out of this week's Meetup Scribbling.

Free pattern download. Really, really simple dress. https://www.lisawagnerlondon.com/?fbclid=IwAR0cglgwmAaBbIVxVuPmjZ-AlOB88b76bdyjgEZ90Qa8URGpv2ick66saR4

Podcasts we like

Currently  issuing episodes
 Sew and Tell  https://www.sewdaily.com/category/sewandtell/
Love to Sew https://lovetosewpodcast.com/
Clothes Making Mavens http://www.clothesmakingmavens.com/

 Past podcasts to listen to
While She Naps  https://whileshenaps.com/category/the-podcast/episodes/

 Blogs we like because they show how they achieve their makes in detail

Wanderstitch - a weekly blog https://www.wanderstitch.com/
 Catherine Daze- https://blog.cyberdaze.org/

That's it for this week.  I hope you are all staying as safe as you can and managing to get some sewing done.  If you have any Podcasts, Blogs or Vlogs that you think interesting and inspiring, please let us know in the comments below.  Better still if you have a blog, vlog or podcast yourself  please give us the link. 

Monday, 27 April 2020

Sunday Scribblings ending 26 April 2020


Thanks to all those who contributed to this Meetup.  Here's the information, minus all the sewing chat.  Please join us on Meetup for this week.

HappyLuckyAlix, who is currently sewing PPE as a volunteer for the Royal Brompton Hospital at a specially set up workshop, gave information for those  in North London who may want to do the same- If anyone is in NW3 or near and wants to volunteer, a new workroom is being set up to sew PPE for the Royal Free hospital: go to @thefashionschooluk on IG and message them if interested.

Free Patterns
PDF Pattern available to download free for limited time- Knit dress with skater skirt and sleeve variations in large size range. https://sinclairpatterns.com/product/valley-knit-skater-dress-with-lantern-sleeves-sleeveless-pdf-sewing-pattern/

PDF pattern available to download free from Friday Pattern Company- a raglan v neck t shirt for men or women -see their blog post of 17 April. https://fridaypatterncompany.com/blogs/blog

Useful tips
I had no idea what this little black button on the presser foot was for- and it is so useful when sewing on varying thicknesses of fabric. https://www.youtube.com/watch?v=awvTyWL8pow&t=0s
It comes in a series of tips on Youtube from Made and Making- worth looking at them as there may be things you didn't know too.

Maureen recently made bias binding from a fat quarter and have loads left after using it for my dress. Then shefound this link to make smaller amounts using smaller squares. She thought it was so neat and is sharing the link.
https://makeit-loveit.com/make-continouos-strip-bias-tape-binding

So-ha had a go at learning some embroidery stitches and  found this tutorial from Mollie Makes very easy to follow: http://www.molliemakes.com/stitch-library/library-embroidery-stitches/  She also shared  artist Sheena Liam's amazing embroidery: https://www.theguardian.com/lifeandstyle/gallery/2020/mar/07/embroidered-female-portraits-in-pictures

London Fabric suppliers online
Simply Fabric is  open for online business
https://www.simplyfabrics.co.uk/
and so is The sewing and craft superstore near Tooting Bec underground. In fact you can do click and collect with them. See their website for details of times and how to contact them.
https://www.craftysewer.com/